Sunday, November 27, 2011

Baked Falafel with Cucumber Sauce


With the growing popularity of food trucks in New York City, many have taken it upon themselves to dabble in the diverse cuisines now available. From waffles to Korean BBQ, there doesn't seem to be anything these trucks won't whip up. However, before the advent of the trendy food truck, food carts stuck to the basics of halal and hot dogs and many hungry midtowners have not turned their backs on these staples. This is where my enthusiastic colleagues come in.

I was once told that you can say anything you want as long as you follow it with "bless her soul", so to my colleagues that regularly bring the distinct smell of "street meat" into the office, bless their souls. To be quite honest, I don't mind the smells so much anymore and frequently enjoy hearing "I am the King of Rafiqi's" (a popular food cart) shouted across the office. And while I do not partake in these food truck/cart lunches, I do still appreciate the types of food they serve...on my own terms.

I'm not sure when exactly it was that I discovered my love of Mediterranean food, but I have come to savor the intensely flavorful dishes of the cuisine. As these discoveries tend to go, when I love a food, I want to learn how to make it myself, so a little over a year ago, I found a falafel recipe that is so phenomenal, I now think my homemade version tastes better than many restaurants! Call me a falafel snob, but it is what it is. This particular recipe combines very healthy amounts of spices to create a savory, delightful end result and the added bonus - I actually know what is going into the mixture. The double bonus, they are baked, rather than fried, so I like to think they maintain a high level of nutritional value.

I have made this recipe a few times now, and after an incident with my blender breaking down the last time, I decided to take full advantage of my mom's functional food processor while home for Thanksgiving to make it once again. (Attempting to get parsley, onion, and garlic into a "puree" form with a knife proved to be a time-consuming and dismal task).

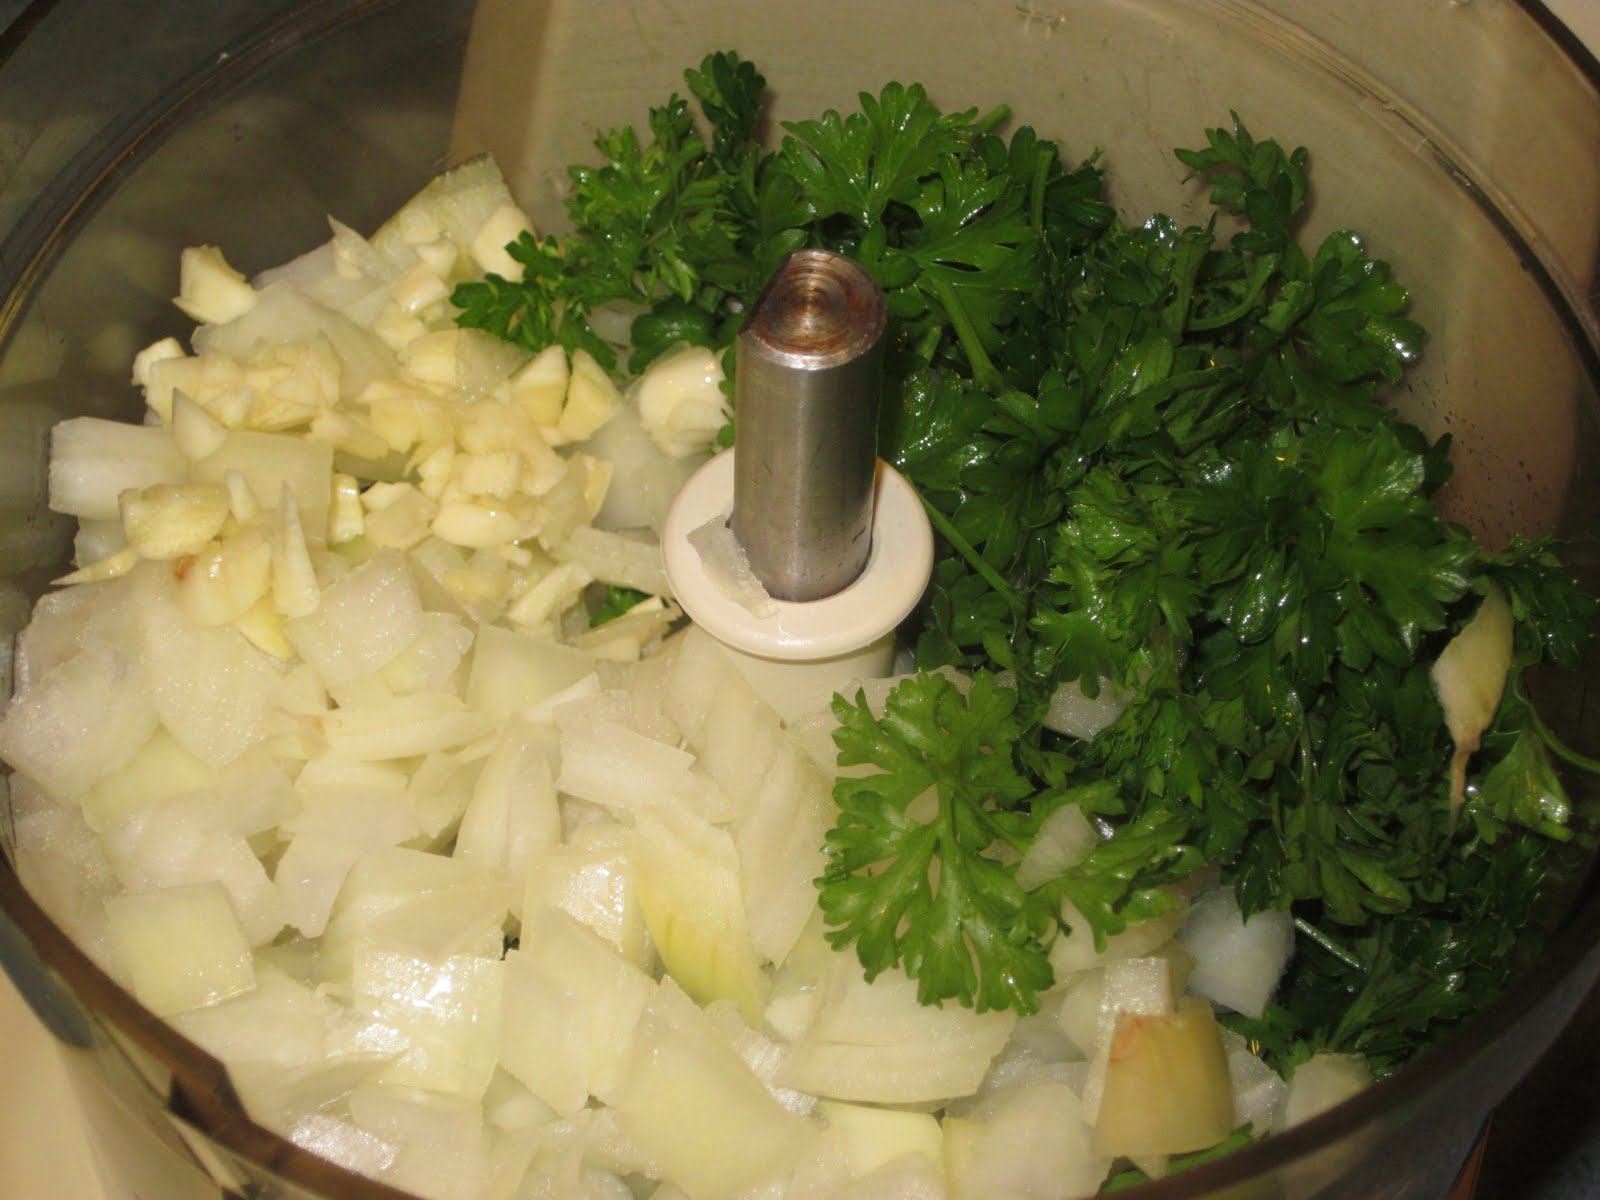
One other potentially problematic step is mashing the chickpeas by hand. A fork or potato masher are your best bet for this operation. Though I have never actually tried, I imagine really tough-to-mash chickpeas could be soaked in warm water for a while to help soften them up.
I did make a few adjustments from the original recipe, including replacing the bread crumbs with a healthier option. I have tried the recipe with both FiberOne bran cereal and most recently Kavli Crispbread, both of which I like, but can change the flavor very subtly. Considering I am the main consumer of my creations, I'm willing to experiment and do enjoy the healthy swap. I also nixed the mayonnaise from the cucumber sauce, because it is plenty tasty without it.

When all is said and done, these falafel, in addition to tasting great with just the cucumber sauce, make great pita sandwiches (+ baby spinach and feta cheese) or they also work well in salads.

The recipe:
(Adapted from Sean's Falafel)

1 (15 ounce) can chickpeas (garbanzo beans), drained and rinsed under cold water
1 onion, coarsely chopped
1/2 cup fresh parsley
2 cloves garlic, coarsely chopped
1 egg
2 teaspoons ground cumin
1 teaspoon ground coriander
1 teaspoon salt
1 dash pepper
1 pinch cayenne pepper
1 teaspoon lemon juice
1 teaspoon baking powder
1 tablespoon olive oil
1 cup dry bread crumbs/healthy substitute

Cucumber Sauce:
1 (6 ounce) container plain yogurt
1/2 cucumber - peeled, seeded, and finely chopped
1 teaspoon dried dill weed
salt and pepper to taste


In a large bowl mash chickpeas until thick and pasty; don't use a blender, as the consistency will be too thin.

In a blender or food processor, process onion, parsley and garlic until smooth. Stir into mashed chickpeas.

In a small bowl combine egg, cumin, coriander, salt, pepper, cayenne, lemon juice and baking powder. Stir into chickpea mixture along with olive oil.

Slowly add bread crumbs until mixture is not sticky but will hold together; add more or less bread crumbs, as needed.

Form falafel balls - I made each about 1 inch, but this is up to you. Spray a foil lined cookie sheet with cooking spray and place the falafel balls on the tray. Bake at 400 degrees for 10 minutes, turn the tray 180 degrees and bake for another 5-10, until the falafel balls are browned on the surface.

In a small bowl combine yogurt, cucumber, dill, salt and pepper. Chill before serving.

Saturday, November 26, 2011

"Holy" French Toast

Every year my Mom attends Thanksgiving morning mass at our church, where they have made a tradition of distributing loaves of blessed "holy" bread to parishioners at the end of mass. After the third time Mom suggested I have some holy bread on Thanksgiving morning, I offered to take the fate of the loaf in my hands; I couldn't risk getting too full before Thanksgiving dinner! What was to come - a new take on one of my favorite french toast recipes, originally courtesy of the Barefoot Contessa.
Considering holy bread is a little difficult to come by, sticking to the original recipe, which somewhat ironically calls for Challah Bread, works just as well.
The dipping mixture harnesses the flavors of orange zest and honey to create a mouth-watering breakfast favorite. I also love adding cinnamon for a little extra spice.
One of the steps that sets this french toast apart is soaking the bread in the egg mixture for several minutes. However, use your discretion depending on the type of bread you choose, otherwise the result could be a disappointing, soppy mess.There's really no need to make this french toast post seem more elaborate and complicated than necessary, so let's get to the good part:

The recipe:
(Adapted from Barefoot Contessa)

6 large eggs
1 1/2 cups skim milk
1 teaspoon grated orange zest
1/2 teaspoon pure vanilla extract
1 tablespoon good honey
1 1/2 tsp. cinnamon
1/2 teaspoon kosher salt
1 loaf bread

Serve with:
Maple syrup
Orange pieces
Sifted confectioners' sugar (optional)

In a large shallow bowl, whisk together the eggs, milk, orange zest, vanilla, honey, and salt. Slice the bread in (3/4-inch) thick slices. Soak as many slices in the egg mixture as possible for about 2 minutes on each side.

Heat a large saute pan over medium heat and spray with non-stick (butter is also great). Add the soaked bread and cook for 2 to 3 minutes on each side, until nicely browned. Place the cooked French toast on a plate and fry the remaining soaked bread slices, adding spray, until it's all cooked.

Serve hot with maple syrup, sliced orange pieces, and/or confectioners' sugar.

Monday, November 21, 2011

Thanksgiving: Practice Round

Stuffing, Cranberry Sauce & DessertDisclaimer: This is a long one.

While enduring a long car ride back to NYC through Middle-of-Nowhere, Pennsylvania, my mind got to wandering about food, the mouth-watering Thanksgiving feast my aunt and uncle prepare every year, and my minimal involvement in the operation. So with that in mind, I posed the idea of a "Thanksgiving practice round" potluck to my roommates. We determined that our poor little oven would cease to function at the sight of a turkey, so we got some help in that department, but once the remaining responsibilities were divvied up, it was time to get to brainstorming. My main task - the stuffing. With so many fantastic recipes out there it was a tough choice, but I settled on a slightly modified version of Fennel, Sausage and Caramelized Apple Stuffing from Cooking Light. Upon subscribing to CL, my close friend in media broke the news that the average reader was ~25 years my senior (ha!), but I have to say I've been thoroughly pleased with the recipe ideas thus far.
When I arrived at Whole Foods to pick up a few last ingredients, I was helped by the lady at the bakery counter who handed me a loaf of sourdough bread fresh from the oven. Now normally this would be a welcomed predicament, but I was a bit concerned about just how fresh (and still hot) the bread was - considering stuffing usually calls for at least day old bread. I decided to trust the recipe and go with it. Low and behold, the fresh bread, which ends up going in the oven to brown and crisp the edges, creates a similar effect to day-old without actually being stale.
While the bread was in the oven I went to work on the other parts of the dish aka I slaved away over the cutting board fighting back onion tears and fending off unruly flying carrot pieces.

As I continued to work my way through the recipe and the ingredients piled up in my bowl, all I could think of was Rachel Ray's "garbage bowls", but instead of reducing trips to the trash can, I was reducing the amount of time I would later hover over the sink hand-washing multiple dishes and pans. Yes, hand-washing. Sadly our dishwasher has been yet another victim of repairs our management company doesn't seem to be competent enough to arrange.
Now don't get me wrong, I'm still enjoying leftovers, but a few notes on the ingredients I chose and how I would potentially tweak them. I opted for chicken sausage to cut out some of fat and make the dish a bit lighter, which I am certain I compensated for by unintentionally using extra bread. To that note, I think a whole wheat baguette would've also been a nice choice, but regardless, be sure to keep the bread to 12 oz. so the other ingredients don't get lost. I think I've proven by now that I'm a flavor junkie, so I likely would have added in an extra sage, fennel seed, garlic and pepper. Lastly, the apple flavor was not all that present in the dish, so if that is something you want, I would go for a more "powerful" apple, like a granny smith.


FENNEL, SAUSAGE AND CARAMELIZED APPLE STUFFING
The Recipe:
12 ounces sourdough bread, cut into 1/2-inch cubes
Cooking spray
1 12 oz. package of Chicken Sausage (I used Sweet Italian)
5 teaspoons extra-virgin olive oil, divided
4 cups onion, chopped
1 1/4 cups fennel bulb, chopped
1 1/4 cups carrot, chopped
2 tablespoons fresh sage, chopped
1/2 teaspoon fennel seeds, crushed
5 garlic cloves, minced
1/2 teaspoon freshly ground black pepper, divided
3 cups chopped Golden Delicious apple
2 teaspoons sugar
1 1/2 cups fat-free, lower-sodium chicken broth
2 large eggs

Preheat oven to 400°. Arrange bread cubes in a single layer on a baking sheet coated with cooking spray. Bake at 400° for 16 minutes or until golden, stirring after 8 minutes. Place in a large bowl.

Heat a large skillet over medium-high heat. Cut chicken sausage into small pieces. Coat pan with cooking spray. Add sausage to pan; cook 8-10 minutes or until browned and crispy. Add sausage to bread.

Return pan to medium-high heat. Add 3 teaspoons oil to pan; swirl to coat. Add onion, fennel, carrot, sage, fennel and garlic. Add 1/4 teaspoon pepper; sauté 8 minutes or until vegetables are tender, stirring occasionally. Add vegetables to sausage mixture.

Return pan to medium-high heat. Add remaining 2 teaspoons oil to pan; swirl to coat. Add apple and sugar; sauté 5 minutes or until apple caramelizes, stirring occasionally. Add to the sausage mixture.

Combine broth and eggs in a small bowl, stirring with a whisk. Add broth mixture and remaining 1/4 teaspoon pepper to sausage mixture; toss well to combine.

Spoon sausage mixture into a 13 x 9-inch glass or ceramic baking dish coated with cooking spray. Cover with foil. Bake at 400° for 20 minutes. Uncover dish; bake at 400° for 20 minutes or until browned and crisp.

HOMEMADE CRANBERRY SAUCE
Any magazine I read seems to insist that homemade cranberry sauce is a requirement for Thanksgiving, so in an effort to avoid the canned jelly blob monster, I thought I too would try my luck at making my own. Mission accomplished. Luckily I had onion left over from my earlier chopping frenzy, so the process was low maintenance.
I did cut the sugar in half from the original recipe, which meant I still used 3/4 of a cup. It felt like a lot of added sugar (maybe agave would be a substitute candidate), but it was worth it.

The recipe:
1 tbsp. canola oil
3/4 c. onion, chopped
3/4 c. sugar (yoiks!)
1/2 c. white wine
1/2 c. water
1 package fresh cranberries
1/4 tsp. ground ginger
2 tsp. fresh grated orange rind

Cook the onion in the oil for about 4 minutes. Add the sugar, wine, water, ginger and cranberries. Bring mixture to a boil for about 2 minutes then reduce to a simmer for about 8 minutes. Add the orange rind to the mixture once in the serving bowl.

THE FINAL ACT: PUMPKIN FLUFF LAYER DESSERT
With so much good food on the way, I wanted to make sure that dessert was light. Going with the flavors of the season, pumpkin seemed an appropriate base. I came across a pudding-type dessert that seemed just perfect - Pumpkin Fluff. I made it my own by creating a "layer dessert". This was a real crowd pleaser and a perfect way to end the meal.


1 16 oz. can pumpkin
1 1.5 oz. box sugar-free instant vanilla pudding mix
1 8 oz. container fat-free cool whip
2 tsp. pumpkin pie spice
1 pack cinnamon graham crackers

Take the cool whip out of the freezer so it has a few minutes to "thaw". Make the pudding and allow it to set (about 5 minutes). Mix in the pumpkin, cool whip and pumpkin pie spice.

In a serving dish crush 2 graham crackers to layer the bottom surface. Spoon or pour in half the pumpkin pudding mixture. Crumble 2-3 more graham crackers to create a middle layer. Add in the remaining mixture and top with crushed graham crackers. Put back in the refrigerator and chill for 1 hour.

Note: If you make this too far in advance the graham crackers might start to get a little soft/borderline soggy, but I have to say, I still somehow managed to enjoy leftovers 24 hours later...proof I love dessert?

And with that, HAPPY THANKSGIVING!
Eat well, be merry and enjoy the company of family and friends!

Thursday, November 17, 2011

Flourless Chocolate Cookies with Chocolate Chips and Walnuts


Flourless baked goods were always a mystery to me -- until the fateful day I stumbled upon this recipe while attempting to shamelessly google my way to the secret formula for Whole Foods' Chocolate Walnut Fudgie Cookies. While the end result for this particular recipe is flat and pancake-like, there is beauty in the minimal required ingredients!

The original recipe only calls for egg whites, powdered sugar, cocoa powder, vanilla and salt (so few that I can recite from memory!), but I decided to add in chopped walnuts and chocolate chips to prevent the cookies from spreading even more.

And for those allergic to nuts, chocolate toffee bars aren't too shabby of a substitute.

Technically if you leave out the mix-ins, these cookies have no added fat and are essentially fat free! But where's the fun in that? Also, for all you glutards out there - they're g-free!

The recipe:
(From King Arthur Flour)

Ingredients:
2 1/4 c. confectioner's sugar
1/4 tsp. salt
1 c. cocoa powder
3 large egg whites
2 tsp vanilla extract
1 c. chocolate chips
1 c. walnuts, chopped
Optional substitute: 1/2 c. chopped toffee bar (Skor or Heath)

Directions (if I can actually call it that):
Preheat the oven to 350 degrees. Lightly grease your baking sheet(s) or parchment lining the baking sheet. Mix together all the ingredients until smooth. Drop ~1 tbsp portions of the batter onto the baking sheets and bake for 8-10 minutes.

Allow the cookies to cool so they don't crumble when you try to pick them up...trust me the wait will be worth it.

Tuesday, November 15, 2011

Butternut Squash Quinoa Risotto


One of the things I most look forward to about the changing season, or maybe just one thing that softens the blow of the impending cold weather, is the array of fall produce to experiment with. Enter: Butternut squash. Recipes for this seasonal favorite seem to be everywhere and I've been especially eager to attempt butternut squash risotto. Several months back I made a delicious sun-dried tomato risotto, but my main reservation with risotto is that although the arborio rice creates a creamy texture, it isn't exactly the best choice in terms of healthy grains. With all the fan-fare around quinoa, which shout out to my mother because she was ahead of the curve and cooking with it years ago, I decided quinoa risotto might be just the fix for this nutritional dilemma. As some people like to call this new take on the dish, Quinotto.Many of the magazines I find myself reading these days advocate going vegetarian at least one day a week, so this recipe is one step in the right direction if you adhere to that philosophy!

The most challenging part of this recipe was probably just figuring out how to cut the seemingly uncooperative butternut squash. I recently observed a method that I think works pretty well so I will impart this new found wisdom on you.

-Begin by cutting a small part of the larger end such that the squash can stand on its own
-From there slice down the middle (this might require two hands to guide the knife evenly down the middle)
-Scoop out the seeds -Remove the outer layer of skin with a vegetable peeler
-Cut the squash to the desired sized pieces.


Also open to debate is the method of preparing the risotto. I find that combining all the ingredients and then adding the chicken broth all at once (rather than one cup at a time until it is all absorbed) works just fine. While either method requires attention and constant stirring, the former is more conducive to the multi-tasking frenzy that is my life.


The recipe:
1/2 small butternut squash, peeled and cubed in 1-inch pieces (the other half makes for some great baked butternut squash fries!)
3 c. baby spinach*
1/2 onion, diced
2 cloves garlic, minced
1 c. quinoa
1/2 c. white wine (room temp.)
3 c. low-sodium chicken broth
1 tsp. butter (if desired)
1 tsp. dried sage (or if you have fresh, even better)**
EVOO, salt, pepper
1/3 c. Parmesan cheese

*I tend to feel better about what I'm eating if there is some green to accompany every dish, hence including the baby spinach. In hindsight, I think adding some boiled kale to the risotto would taste even better and add some great texture to the dish.
**If you use fresh sage wait until the end and mix in with butter and cheese.

Preheat the oven to 400 degrees. Start by cutting the butternut squash into pieces as detailed above, line a baking sheet with foil (for quick clean up), spray a baking sheet with cooking spray, line the squash on the baking sheet and sprinkle with pepper. Bake for ~30 minutes until the squash is tender and easy to fork. (I then waited until the squash was done to move on to the next step because my roommate needed the kitchen. Depending on your timing this could also impact the ultimate method you use to make the risotto).

Sautee the onion and garlic in olive oil (~1 tbsp) in a medium sized sauce pan or pot until the onion is transparent. Add in the cooked butternut squash and the uncooked quinoa. Allow this mixture to sit for a minute to "toast" the quinoa then stir in the white wine, sage, salt and pepper. Continue to stir until the wine is absorbed. Next add in the chicken broth and bring the ingredients to a boil. Reduce to a simmer and cook until the liquid is absorbed and the mixture thickens (about 12-15 minutes).

Remove from heat and mix in the butter and parmesan cheese (you could also try adding in some almond milk or regular milk to add to the creaminess).

Friday, November 11, 2011

Pear Invasion: Featuring Bok Choy, Ground Turkey and Greek Yogurt

I'm not sure whether this so called "pear invasion" was a product of my severe indecisiveness or just a bout of creativity, but either way, the end result was a satisfying and flavorful dish that I already can't wait to make again.


Growing up, my family spent some time in Hong Kong, which naturally meant that we were able to experience various types of Asian cuisine. While my adventurous spirit was often lacking during the time we were there, luckily my mom continued to incorporate vegetables such as bok choy into dinners when we returned to the US. (Did I mention that she is also a fantastic cook and comes from a family full of gourmet chefs!) Anyhow, I've been on a hunt to incorporate bok choy into my diet more frequently beyond just throwing it into a stir fry or sauteeing it. So, when I came across this recipe for Bok Choy and Apple Slaw in Real Simple magazine my interest was piqued.

A little detail about the ingredients I decided to use:
Bok choy has always been a bit intimidating with its large leafy presence, so I typically opt for the baby bok choy instead.
Pears are fantastic around this time of year and there are so many varieties to choose from - I however chose to use a more traditional Bartlett for this recipe.
Ground Turkey is one ingredient that I purchase, repack into single sized portions and freeze for single-serving opportunities like this.
Greek yogurt is another ingredient that I end up needing more often than one would think, so I try to keep it around my fridge.


So you might be wondering what is so indecisive/creative about this recipe? Allow me to elaborate. I incorporated pear into every facet of this dish to ultimately create a salad. Pear mixed with the greens, pear in the turkey mixture and pear in the dressing!


The recipe:

2 heads of baby bok choy
1 pear, skin removed, cut into 4 equal wedges

1/2 lemon
1tbsp + 1 tsp greek yogurt

4 oz. lean ground turkey
~1/2 in. grated fresh ginger
1/3 c. onion, chopped
1 tsp soy sauce
1/2 tsp. dried parsley
1/4 tsp. garlic powder
Salt and Pepper to taste

Optional: A few crumbled walnuts

Begin by washing the baby bok choy and cutting into manageable bites, probably about 1 inch wide. Next, cut the pear into 4 pieces and sqeeze a little lemon juice over the slices to prevent browning. Cut one slice into long strips, chop once slice, dice one slice and enjoy the last one as a snack while you cook.

Add some cooking spray to a pan and sautee the ground turkey, ginger and onion over low-med heat. After about 2 minutes add soy sauce, dried parsley, garlic poweder, salt and pepper to the pan. Next add in the chopped 1/4 pear. Mix as necessary and until the turkey is done, but be sure not to overcook or you might risk drying it out.

Next add the diced pear to a mini chopper with some lemon juice (probably about 1 tsp). Turn on the chopper to puree, which won't take long, given the small quantity. Add in the greek yogurt and mix in the chopper again for about 10 seconds.

Plate the bok choy with the long slices of pear, add the cooked turkey mixture and top with dressing.

Now I would be lying if I told you I ate this right then and there. As difficult as it was, I was able to resist consumption until the next day for lunch. As a packing tip, the yogurt dressing actually added a nice moisture to the turkey come the next day so I would advise setting it a tupperware container so that the dressing more or less sits on the turkey. Also, a few walnuts crumbled up was a nice touch to finish off the salad.

Tuesday, November 8, 2011

Poached Salmon Over Roasted Red Pepper Spread + A Side of Kale


(Forgive the ever elegant Correlle plates - I realize now they aren't the best for photographing!)

Sadly it isn’t all that practical to take a long hot shower every time I need to brainstorm ways to inject creativity into my writing, so I sit here on Day 1, Post 1 vowing (to myself) that in time I will come into my food writing voice. So, here we go.

One thing I learned quickly upon moving to NYC is that a bite-sized kitchen shared by 4 fabulous roommates does not lend itself to excess. The result: more frequent than I care to admit trips to Whole Foods and Trader Joe's. However, with that said, the feature ingredient for this dish somehow survived several months of neglect in the freezer before making it to the plate. I know, freezer packed Salmon, I'm not bragging, but with the appropriate preparations, the result was quite tasty.

The inspiration for this dish comes from a recently discovered love of roasted red pepper spread (Trader Joe’s makes a killer Roasted Red Pepper and Eggplant version) as well as a SimplyRecipes tutorial on poached Salmon...might as well learn something new as part of this whole blogging adventure, right?

While this was my first foray into poaching Salmon, I must say I was pleasantly surprised at how easy it was. Given that I cook for myself, I opted to use the sole piece of Salmon I had, yet kept the poaching liquid at proportions that would accommodate about 1 lb of Salmon.

The recipe:

* 1 salmon fillet
* ½ cup white wine (I had Chardonnay at my disposal)
* ½ cup water
* A few thin slices of yellow onion
* Sprig of basil, roughly chopped
* 1 heaping tsp of dried parsley
* Sprinkle of dried dill, about ¼ tsp
* Freshly ground black pepper
* Roasted red pepper spread (like the kind from Trader Joe’s)
* Large handful of chopped kale
* Garlic clove, roughly diced


Combine the wine, water, herbs and onion in a saute pan, and bring to a simmer on medium heat. Allow the liquid to simmer for a few minutes to blend the flavors. Place the salmon fillet (skin-side down) in the pan. Cover and simmer for about 5 minutes or until the Salmon flakes. Note: cooking times may vary depending on the size of the Salmon.

While the Salmon is simmering, add the handful of kale to a pan and drizzle with some water. Allow the kale to cook over medium heat. As it begins to soften, toss in the garlic and sprinkle some pepper.

Plate the Salmon over as much Red Pepper Spread as your heart desires, add the side of kale and voila - dinner is served!