Showing posts with label Main dish. Show all posts

Sunday, November 11, 2012

Moroccan Eggplant & Tomato Salad

Standing in front of a pay-by-the-pound gourmet lunch buffet is probably not the best time to discover (and embrace) that you do in fact actually like eggplant, but naturally that is what happened to me. Dishes to Go by work has some great eggplant side dishes - usually middle eastern inspired. Given that the weight adds up, I figured it was about time to enjoy the dish on my own terms. 
During my recipe hunt, I was thrilled to stumble upon this recipe by the Shiska in the Kitchen. Just a few tweaks, a bit of patience and then I was able to enjoy this new gem over and over again!

The recipe:
1 large eggplant
3 tbsp olive oil
1 red or yellow bell pepper, seeded and cut into chunks
1/2 onion, thinly sliced
4 cloves garlic, minced
1 can (14.5 oz) fire roasted diced tomatoes
1 cup water
1 tsp cumin
1 tsp salt (or to taste)
1 tsp brown sugar
1/2 tsp paprika
1/2 tsp crushed red pepper flakes
1/2 tsp black pepper

Paritally peel the eggplant in stripes, keeping strips of skin intact so they run down the sides of the eggplant vertically. I like the idea of leaving more of the skin on because it adds flavor and structure, so I only peeled off a few strips.

Heat 1 tbsp olive oil in a large skillet over medium. Cut the eggplant into 1-inch chunks. Put half of the chunks into the skillet and saute for about 10 minutes.

When the cubes begin to turn golden brown, transfer them to a larger pot. Add 1 tbsp of olive oil to the skillet and saute the second batch of eggplant chunks the same way, for about 10 minutes till golden brown. Transfer the chunks to the large pot.

Add 1 tbsp of olive oil to the skillet and add the bell pepper chunks and onion. Let them saute for about 3 minutes. Add the minced garlic and continue to cook for 2 more minutes, until the garlic is fragrant.

Transfer peppers and garlic to the large pot.

Add in the diced tomatoes, water, cumin, salt, sugar, paprika, crushed red pepper flakes and black pepper and bring all ingredients to a boil.

Reduce heat to a medium-low simmer and cover the pot, leaving a small gap open to vent. Let the mixture slowly simmer for 1 hour till sauce is thickened and reduced. Remove from heat.

Serve over quinoa or enjoy by itself!

Friday, October 26, 2012

Loaded Veggie Egg White Frittata

Not many would argue that brunch is a staple in New York - for both social and sustenance-related reasons.

I have had the pleasure of trying different brunch spots around the city and while Friedman's Lunch remains hands down my favorite (eggs with style; poached, chicken sausage, sub potato hash), some of my fondest memories are from homemade brunches enjoyed on the rooftops of my favorite Brooklyn dwellers. While my mom (of course) has always been up on the frittata scene, this recipe was introduced to me during one of the rooftop brunch gatherings. Love at first bite - I knew this was a recipe to request from the lovely hostess. Only a few minor adjustments to the cooking technique/ingredients.
It seems that regardless of the time that I make my way to brunch, I tend to exhibit familiar behavior...selecting eggs to start my day. So - this vegeful frittata is a great way to load up on veggies while still fueling the morning with some eggs. It packs a lot of flavor, not to mention nutrients.

The recipe:

1 tbsp. olive oil
2 small potatoes (like Trader Joe' potato medley), washed and thinly sliced
Broccoli, 1 cup
Cauliflower, 1 cup
½ cup carrots, thinly sliced
1/2 onion, thinly sliced
1 10 ounce pkg. frozen chopped spinach, thawed and drained
Trader’s Joe’s Everyday Seasoning (or your favorite seasoning blend)
4 cloves garlic, minced
2 tbsp fresh basil, finely chopped
1 16oz. carton egg whites (you may need to add some additional egg whites depending on how generous you are with the veggies)
1/2 tsp. Salt
1 tsp. black pepper
1 cup shredded cheese (I used a 3 cheese blend)

Preheat oven to 400 degrees.

In a 12 inch skillet, bring 1 cup of water to a boil. Add broccoli, cauliflower, potato, carrot, and onion. Cover an simmer 6-8 minutes until vegetables are tender-crisp and water is evaporated.

Add ~1 tbsp of oil to the skillet, add in garlic along with some Everyday Seasoning (~1tsp) and saute for about 1-2 minutes.

Meanwhile, in a bowl, combine egg whites, cheese, basil, salt, pepper, everyday seasoning (~1 tsp). Pour over the vegetables. Allow the mixture to begin to set, about 2 minutes. Transfer to the oven to finish cooking. This will likely take somewhere around 15 minutes, but could take longer so be patient (this will depend somwhat on the positioning of the oven rack).

If necessary, continue cooking longer than 15 minutes - until almost set but still glossy. Cut into wedges to serve.

Tuesday, October 2, 2012

Balsamic Fig & Brie Panini

I guess we can go ahead and clear up the name of this post right away. My roommate was kind enough to question my so called panini, which in the absence of a panini press, is really just a glorified grilled cheese. Valid point, but I still like the fancy name. Let's proceed.

There are few foods as comforting as grilled cheese and tomato soup, particularly on a cold/rainy day. So I guess the fact that this is an American classic makes it easy to understand how grilled cheese has earned its rightful place in the food truck craze. In fact, the tradition of a Thursday trip to Morris Grilled Cheese Truck has evolved among several of my desk mates aka food truck enthusiasts. While at times they stray from the Classic melt, I have yet to hear of anyone returning with figs and brie in their sandwich (shocker). 

Seeing as it was love at first Fig Newton for me, I have been desperately trying to think of a fig recipe to feature before they cease to be available in the produce section. But the wait is over - this seasonally appropriate grilled cheese variety is quickly melting my heart... and the use of the balsamic glaze really elevates the flavors to leave a memorable/pleasant after taste.
While some might show their fig love by purchasing Costco sized flats of fresh figs (ahem, Katie/GF Blondie), many grocery stores do carry this delicate fruit while in season during late summer - early fall. A few caveats though: figs are fragile and won't keep for too long so be sure to use them within a day or two of purchase. 
I had a whole host of other ideas for what could go into this panini, but ultimately decided to keep it simple. However, in the spirit of full disclosure, here are a few more twists you could take:
- Caramelized onions
- Thinly sliced turkey breast or ham
- Honey drizzle
- Nothing beats fresh figs, but fig butter/jam is prettttty tasty too


The recipe (single serving):
- 2 pieces of multi-grain bread
- 2 fresh figs, sliced
- Balsamic glaze, estimated ~1 tsp.
- Brie cheese, enough to mostly cover the slice of bread
(Note: I recommend cutting the brie into smaller pieces than pictured above or at least making slices in the long strip to assist in the melting process)


Heat a skillet over medium heat.

Lightly spread the tops of each slice of bread with butter (I used light). On the bottom half of the bread, layer the cheese, add a drizzle of balsamic glaze, then top with the figs, add an additional drizzle of balsamic glaze. Top with the other slice of bread.

Add a few drops of oil to the skillet and then add the sandwich. Cook until bottom is golden, about 4 minutes. Flip sandwich over, and repeat with opposite side. It helps to apply pressure along the way to the top of the bread slice to help the ingredients congeal. Cut and serve immediately.

Monday, August 27, 2012

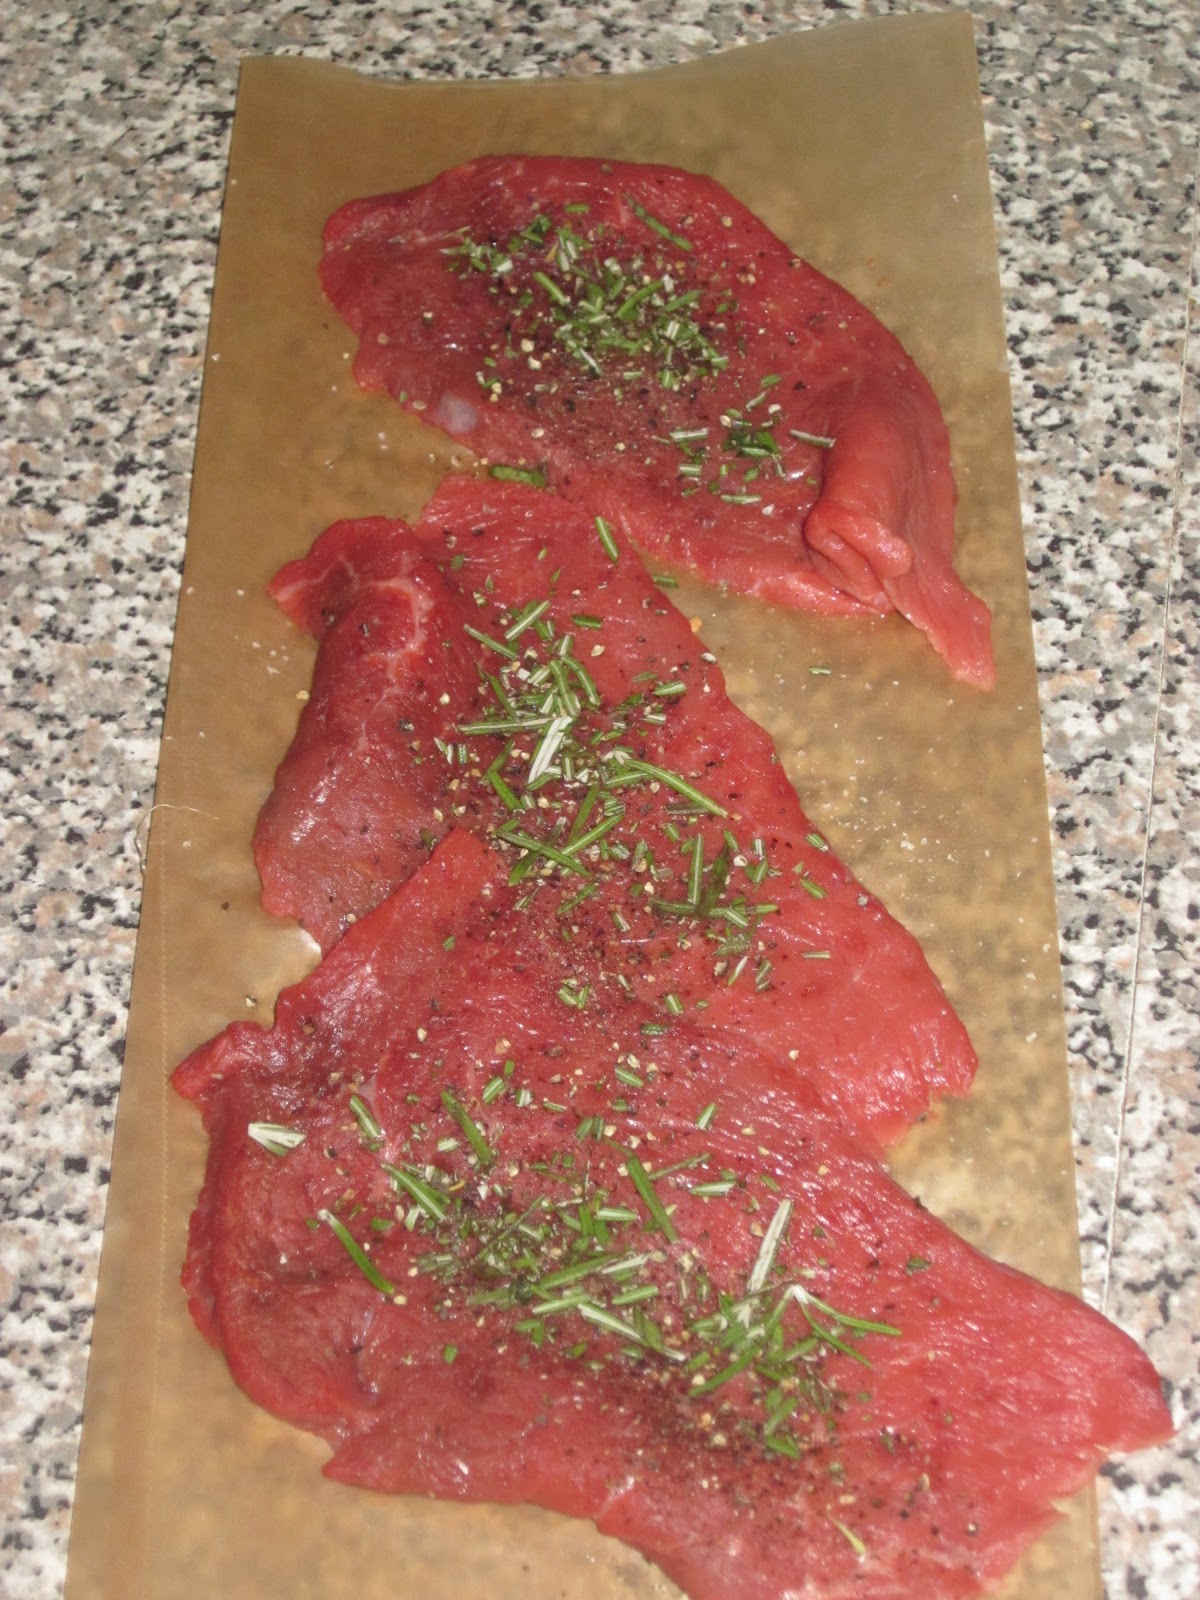
Steak & Veggies a la Chickpea Crêpe


Well three nights in a row of sauteed zucchini and onions probably warrants some real estate on the blog. I must say, multiple bouts of food envy collided to produce this wonderful concoction of a dish.

Envy #1 - Mom's grilled zucchini and onions. Yum! Nothing quite compares to the nostalgia of being at home and eating dinner (fresh off the grill) outside on the screen porch with mom and dad.
Envy #2 - Bar Suzette Crêperie. A Sunday stroll through Chelsea Market wouldn't be complete without visiting the sample sale of the weekend or more importantly some of the market mainstays - for example Bar Suzette . However, when the crêperie closes early for a special event...food envy ensues.
Envy #3 - Carnivorous cravings. Every now and then who doesn't love a good steak, even if it is in the form of thinly sliced strips!
Ultimately the crepe provided a bit of a smoky spice, while the veggies and steak offered a savory balance, reminiscent of an herbes de provence blend. All in all providing a full range of tasting experience for an eager palate.

The recipe:
Crepe (makes 2):
1/4 c. chickpea flour
1/4 c. almond milk
2 tbsp. water (maybe a little more)
dash of cayenne
dash of cumin
1/4 tsp. salt

Filling:
1/2 yellow onion, thinly sliced
1/2 large zucchini (or 1 medium), cut in match sticks
1 ear medium sweet corn, kernels sliced off
1 tbsp basil, chopped
2 cloves garlic, fine chop
1/3 lb. top sirloin (or another lean cut of beef)
2 tsp rosemary, fine chop
Salt
Pepper
Olive oil
Plain greek yogurt for garnish

Begin by slicing up the vegetables/herbs. Add ~1/2 tsp olive oil to a saute pan and add onions. After about 3 minutes add in zucchini, corn and garlic (using additional oil/cooking spray as necessary to prevent burning). Cook for another 3 minutes, add desired amount of salt and pepper along with fresh basil.

Meanwhile mix together ingredients for crepes until a liquid consistency is achieved. Pour batter into a 9 inch pan and spread to cover the full pan. Cook over low-med heat. Flip once the edges start to curl.

Moving on to the steak, season with salt and pepper and press chopped rosemary into the meat. If using thin sliced meat, you will only need to cook for about 30-60 seconds on either side.

Transfer the crepe to a plate and top with all the ingredients + a dollop of plain greek yogurt. 

Sunday, May 27, 2012

Mediterranean Turkey Burgers with Mint-Pomegranate Yogurt Sauce

Well I wasn't expecting a return to the blog at least until I was through my test (1 week!!!), but this Memorial Day Weekend of studying and isolation has left me somewhat craving a creative outlet. So today, I bring to you my gourmet MDW cook-out. 

The latest issue of cooking light features an array of burger recipes and even spills the beans on techniques for a better burger. Flipping through the pages, I knew I had to finally get around to making the mediterranean/greek burgers I have been putting off for quite a while. Some of my favorite restaurants in NYC (Meme Mediterranean, ilili) serve the most amazing mediterranean food  and lamb burgers are always on the menu - I opted for a fusion of the same flavors, using turkey instead. The special twist is that nestled inside is a wonderful mixture of feta cheese, onion and garlic.

I happened to find/use 99% fat-free ground turkey, which is pretty much asking for the burger to be dried out, but fear not, that's where the greek yogurt comes in. When mixed in with the ground meat and spices, it adds a nice amount of moisture to the equation. In terms of the spices, I probably could have been a bit more liberal in the quantities, but I thought the flavors worked nicely regardless. In fact, I decided to save my bread until the end of my meal so I could enjoy the flavors of the burger free of distraction.
While normally, I would have topped these burgers off with some traditional tzatziki, I had an inexplicable case of pomegranates on the brain, so tzatziki had to step aside for its replacement...mint pomegranate yogurt sauce. Don't be surprised if there is another pomegranate post sometime in the near future - I recall reading somewhere that pomegranate seeds don't keep for too long.


Happy Memorial Day from my kitchen to yours!


The recipe:

Burger:
2 tbsp. red onion
1-2 cloves garlic
1 tbsp. feta cheese

1/4 lb. ground turkey (I used 99% fat free)
1 tbsp. plain non-fat greek yogurt
1/2 tsp. lemon juice
1/2 tsp. dried oregano
1/2 tsp. rosemary
1/2 tsp. black pepper
1/4 tsp. ground cumin
1/8 tsp. paprika
1/8 tsp. of ground cinnamon

Italian bread (or whatever bread you choose)

Mint Pomegranate Yogurt Sauce
Fresh mint leaves, 1-2 tsp chopped
1 tbsp. pomegranates seeds
1 tbsp. plain non-fat greek yogurt

Garnish:
Baby spinach leaves
Cucumber

Heat 1 tsp of olive oil in a nonstick skillet over medium-high heat. Add the onion and cook until soft and translucent, about 3 minutes then add garlic and saute for another minute. Remove from heat, add feta cheese and sprinkle with pepper.

Add ground turkey to a bowl, add yogurt, lemon juice, cumin, oregano, rosemary, paprika and cinnamon. Mix together (don't overmix) until combined. Make 2 equal sized patties out of the turkey mixture. Put the onion-feta mixture onto half of the patty. Top with the other patty working the turkey around the edges to seal burger closed.

Spray a nonstick grill pan with cooking spray and heat over medium-high heat. Grill the burger until cooked through, about 5 minutes per side.

Meanwhile chop mint and mix together with pomegranate seeds and greek yogurt.

To serve, slice burger in half and place both halves on top of lightly toasted italian bread. Top with yogurt sauce, then if you so choose add cucumber slices and baby spinach.


Sunday, February 19, 2012

Blackened Tilapia Baja Tacos

If it weren't for the mild winter we've experienced, right around now would mark the time of year when I start really craving a beach vacation. Actually, scratch that, I am still craving one! Despite my best efforts to escape for President's Day weekend, the $800 flights to Florida just didn't seem all that logical, leaving me with culinary escape as my best option.
No food screams "island" to me quite like fish tacos so I decided to bring back a recently discovered favorite, blackened baja tacos. Last September I took a trip to California, starting in the South and making my way up to the San Francisco area. One culinary dream I envisioned was eating the best fish tacos of my life, however sadly that remained just a dream, especially because I found this recipe right before I left.

The recipe (Adapted from Cooking Light):

1/4 cup fat-free sour cream or 0% Plain Greek Yogurt
2 tablespoons chopped fresh cilantro
2 tablespoons fresh lime juice
1 jalapeño pepper, seeded and chopped
1 cup thinly sliced white onion

1 1/2 teaspoons paprika
1 1/2 teaspoons brown sugar
1 teaspoon dried oregano
3/4 teaspoon garlic powder
1/2 teaspoon salt
1/2 teaspoon ground cumin
1/4 teaspoon ground red pepper
4 (6-ounce) tilapia fillets (I made 2 fillets with this quantity of seasoning and had a bit of leftover that I keep around for chicken)

Handful of red or green cabbage
6-inch corn tortillas
1/2 ripe peeled avocado, thinly sliced
4 lime wedges

Combine first 4 ingredients in a food processor; process until smooth. Combine jalapeño sauce and onion in a small bowl. Scale the quantity of sour cream up or down depending on desired level of "kick".

Combine paprika and next 6 ingredients (through ground red pepper); sprinkle evenly over fish and press in. Heat skillet over medium-high heat and coat with cooking spray. Add fish to pan and cook approximately 3 minutes on each side or to desired level of doneness.

Warm tortillas and top with fish, avocado, cabbage and jalapeño sauce. And with that, escape to the tropics!

Wednesday, December 21, 2011

Wasabi Pea Crusted Tofu with Bok Choy and Ponzu-Soy Dipping Sauce

How does one come to enjoy eating tofu? Well, after severely abusing chicken on the George Foreman grill during my sophomore year of college, I cut myself off from the protein and decided to make the switch to tofu. I have since reintroduced chicken into my cooking rotation, but for about 2 years my go-to was the spongy scary white blob that many prefer to avoid.

While my use of the ingredient often leads to a stir-fry of some sort, I'm always on the hunt for ways to feature tofu as the main event. When I came across a recipe for pistachio crusted tofu, the hunt was over. I decided that a twist on the idea would be a great direction for my first tofu blog post (I can't believe it has taken so long!). Instead of using pistachios, the accompanying ingredient would be, drum rollll...wasabi peas!

Interestingly, wasabi as we know it in the US is really just a colored horseradish-based substitute, rather than the expensive and difficult to cultivate root vegetable found in Japan. "Western wasabi" is often found alongside sushi and sashimi or in this case, incorporated into a coating on green peas. Usually famous for their heat, this particular variety of wasabi peas did not have quite as much kick to them as others I have tried, however I still enjoyed the flavor they added to the tofu. I'm sure blending with some additional wasabi powder or paste would have solved the heat dilemma.

One of the funniest memories I have of tofu is my mom trying to get me to eat it in 4th grade through some sneaky tactics. By putting the tofu in "burger" form she managed to trick me...at least for a few bites. But with dessert on the line, I had to find a way to get through the meal. This phase of highly nutritious, tofu laden dishes often left my dad craving a greasy Whopper every now and then, but he too has come around.

One reason that I love cooking with this food that so many find repulsive is that it's very easy to transform the flavor into whatever you want. Almost like a blank canvas that gives you the artistic freedom to go to work. In this case I thoroughly enjoyed the added flavors of both the wasabi peas and the ponzu dipping sauce, which really added a memorable finishing touch.
As you know by now, adding green to my plate completes the meal for me. Bok choy is always a wonderful complement to tofu dishes so I opted to use it once again.The recipe:
(Adapted from Epicurious)
1/2 block firm tofu
1/2 c. ponzu sauce
2 cloves garlic, minced
1/2 cup wasabi peas
1 tsp. pepper
1 tsp. sesame oil
1 tsp. soy sauce

Bok Choy:
2 heads baby bok choy
1 clove garlic, minced

Begin by draining the water from the tofu package and slicing the tofu block down the middle (long side). Return the unused half to the package, cover with some water and plastic wrap, unless doubling this recipe. Slice the remaining piece in half again and then form triangles from the 2 large rectangles. In reality you can do any shape you'd like.

Place the pieces of tofu between paper towels to absorb the excess water.

Mince the garlic and set aside the equivalent of one clove for the bok choy. Add the remaining garlic to a shallow dish with ponzu sauce. Then set the pieces of tofu in the dish. Be sure the tofu is at least partially covered and allow to marinate for about 15 minutes, turning halfway through.

Meanwhile, prepare the bok choy by simply washing and slicing the baby bok choy to the desired size and then saute over medium heat until softened. Pour the wasabi peas into a mini food processor and blend into a powder form. Once blended spread on a plate with the pepper.

Once the tofu is done marinating, dip the pieces in the wasabi pea powder to coat each side then saute in sesame oil over med-high heat until golden brown.

Reserve the ponzu marinade and combine with soy sauce for a delicious dipping sauce.

Tuesday, November 15, 2011

Butternut Squash Quinoa Risotto


One of the things I most look forward to about the changing season, or maybe just one thing that softens the blow of the impending cold weather, is the array of fall produce to experiment with. Enter: Butternut squash. Recipes for this seasonal favorite seem to be everywhere and I've been especially eager to attempt butternut squash risotto. Several months back I made a delicious sun-dried tomato risotto, but my main reservation with risotto is that although the arborio rice creates a creamy texture, it isn't exactly the best choice in terms of healthy grains. With all the fan-fare around quinoa, which shout out to my mother because she was ahead of the curve and cooking with it years ago, I decided quinoa risotto might be just the fix for this nutritional dilemma. As some people like to call this new take on the dish, Quinotto.Many of the magazines I find myself reading these days advocate going vegetarian at least one day a week, so this recipe is one step in the right direction if you adhere to that philosophy!

The most challenging part of this recipe was probably just figuring out how to cut the seemingly uncooperative butternut squash. I recently observed a method that I think works pretty well so I will impart this new found wisdom on you.

-Begin by cutting a small part of the larger end such that the squash can stand on its own
-From there slice down the middle (this might require two hands to guide the knife evenly down the middle)
-Scoop out the seeds -Remove the outer layer of skin with a vegetable peeler
-Cut the squash to the desired sized pieces.


Also open to debate is the method of preparing the risotto. I find that combining all the ingredients and then adding the chicken broth all at once (rather than one cup at a time until it is all absorbed) works just fine. While either method requires attention and constant stirring, the former is more conducive to the multi-tasking frenzy that is my life.


The recipe:
1/2 small butternut squash, peeled and cubed in 1-inch pieces (the other half makes for some great baked butternut squash fries!)
3 c. baby spinach*
1/2 onion, diced
2 cloves garlic, minced
1 c. quinoa
1/2 c. white wine (room temp.)
3 c. low-sodium chicken broth
1 tsp. butter (if desired)
1 tsp. dried sage (or if you have fresh, even better)**
EVOO, salt, pepper
1/3 c. Parmesan cheese

*I tend to feel better about what I'm eating if there is some green to accompany every dish, hence including the baby spinach. In hindsight, I think adding some boiled kale to the risotto would taste even better and add some great texture to the dish.
**If you use fresh sage wait until the end and mix in with butter and cheese.

Preheat the oven to 400 degrees. Start by cutting the butternut squash into pieces as detailed above, line a baking sheet with foil (for quick clean up), spray a baking sheet with cooking spray, line the squash on the baking sheet and sprinkle with pepper. Bake for ~30 minutes until the squash is tender and easy to fork. (I then waited until the squash was done to move on to the next step because my roommate needed the kitchen. Depending on your timing this could also impact the ultimate method you use to make the risotto).

Sautee the onion and garlic in olive oil (~1 tbsp) in a medium sized sauce pan or pot until the onion is transparent. Add in the cooked butternut squash and the uncooked quinoa. Allow this mixture to sit for a minute to "toast" the quinoa then stir in the white wine, sage, salt and pepper. Continue to stir until the wine is absorbed. Next add in the chicken broth and bring the ingredients to a boil. Reduce to a simmer and cook until the liquid is absorbed and the mixture thickens (about 12-15 minutes).

Remove from heat and mix in the butter and parmesan cheese (you could also try adding in some almond milk or regular milk to add to the creaminess).

Tuesday, November 8, 2011

Poached Salmon Over Roasted Red Pepper Spread + A Side of Kale


(Forgive the ever elegant Correlle plates - I realize now they aren't the best for photographing!)

Sadly it isn’t all that practical to take a long hot shower every time I need to brainstorm ways to inject creativity into my writing, so I sit here on Day 1, Post 1 vowing (to myself) that in time I will come into my food writing voice. So, here we go.

One thing I learned quickly upon moving to NYC is that a bite-sized kitchen shared by 4 fabulous roommates does not lend itself to excess. The result: more frequent than I care to admit trips to Whole Foods and Trader Joe's. However, with that said, the feature ingredient for this dish somehow survived several months of neglect in the freezer before making it to the plate. I know, freezer packed Salmon, I'm not bragging, but with the appropriate preparations, the result was quite tasty.

The inspiration for this dish comes from a recently discovered love of roasted red pepper spread (Trader Joe’s makes a killer Roasted Red Pepper and Eggplant version) as well as a SimplyRecipes tutorial on poached Salmon...might as well learn something new as part of this whole blogging adventure, right?

While this was my first foray into poaching Salmon, I must say I was pleasantly surprised at how easy it was. Given that I cook for myself, I opted to use the sole piece of Salmon I had, yet kept the poaching liquid at proportions that would accommodate about 1 lb of Salmon.

The recipe:

* 1 salmon fillet
* ½ cup white wine (I had Chardonnay at my disposal)
* ½ cup water
* A few thin slices of yellow onion
* Sprig of basil, roughly chopped
* 1 heaping tsp of dried parsley
* Sprinkle of dried dill, about ¼ tsp
* Freshly ground black pepper
* Roasted red pepper spread (like the kind from Trader Joe’s)
* Large handful of chopped kale
* Garlic clove, roughly diced


Combine the wine, water, herbs and onion in a saute pan, and bring to a simmer on medium heat. Allow the liquid to simmer for a few minutes to blend the flavors. Place the salmon fillet (skin-side down) in the pan. Cover and simmer for about 5 minutes or until the Salmon flakes. Note: cooking times may vary depending on the size of the Salmon.

While the Salmon is simmering, add the handful of kale to a pan and drizzle with some water. Allow the kale to cook over medium heat. As it begins to soften, toss in the garlic and sprinkle some pepper.

Plate the Salmon over as much Red Pepper Spread as your heart desires, add the side of kale and voila - dinner is served!