Showing posts with label Vegetarian. Show all posts

Monday, January 21, 2013

Sweet Potato Quinoa Cakes with Blackberry Jam

As time would have it, some of my co-workers are starting to become privy to my blogging (and general food obsession). You can only get so excited about the purchase of a mini-food processor without people starting to wonder....

So when my desk neighbor asked me what was next up on the blog, I decided to take a poll on which recipe should be featured next...without much debate the quinoa cakes won out. Can't say I'm complaining - I think my appreciation for quinoa aka "the superfood" has been evidenced over the past year +.   
Often times, the inspiration behind my recipes is as simple as having ingredients around that I don't want to go to waste. And let me say, it's a good thing sweet potatoes have such a long shelf-life because I put this off for much too long. The flavors of the fresh herbs, caramelized onions and sweet potatoes all come together very nicely into a healthy little cake. The original recipe called for a fresh blackberry salsa accompaniment, but for simplicity sake I decided to use blackberry jam instead - a perfectly acceptable stand-in, but next time I'll go for the salsa!  

The recipe
(From HowSweetEats)


1 medium sweet potato, peeled and chopped
1/2 red onion, diced
1/2 teaspoon salt
1/2 teaspoon pepper
2 garlic cloves, minced
1 tablespoon olive oil
1/2 cup cooked quinoa (be sure to rinse the quinoa before cooking!)
1/4 cup panko bread crumbs
1/4 cup finely grated parmesan cheese
2 tablespoons chopped fresh cilantro
2 tablespoons chopped fresh basil
1 large egg, lightly beaten

Heat a large skillet over medium-low heat and add 1/2 tablespoons olive oil. Add in sweet potato, onion, 1/4 teaspoon of salt and 1/4 teaspoon of pepper, stir, cover and cook for 10-12 minutes, or until potato is soft. Remove lid and add garlic, cooking for 30 seconds.

Transfer potato mixture to a large bowl (slightly mashing potato with a fork) and add quinoa, breadcrumbs, cheese, herbs, remaining salt and pepper and mix well. Once combined, add in egg, then mix until moistened.

Using your hands to bring it together, form equally-sized patties to desired size. Heat the same skillet over medium heat and add olive oil. Add cakes and cook for 3-4 minutes per side, or until golden brown. Serve with blackberry jame (or salsa, below).

Blackberry Salsa
1 pint fresh blackberries, chopped
1/2 red onion, finely diced
1/2 jalapeno, finely diced
1/2 cup chopped cilantro
the juice of 1 lime
salt and pepper to taste

Sunday, January 13, 2013

8 Vegetable Soup

I'm still holding out for the day when my office aka second home (sigh) finally masters the art of temperature control, but until then, I will continue complaining and my scarf will stay on (acquiring a work appropriate snuggie is a work in progress). Given these arctic conditions, I think my co-workers would agree it's perfectly acceptable to crave soup year-round, but particularly to combat the January blues.
Upon moving to New York, I quickly learned about a great soup spot known as Hale & Hearty. Despite abusing my right to "sample" a soup every time I go, I always seem to default back to their delicious and low-calorie 10 vegetable soup as my final selection. It still isn't entirely clear to me which 10 vegetables they claim to have in their soup, but I decided it was time I attempt a version of my own...8 vegetable soup.

The recipe:
Seasonings:
4 cloves minced garlic
2 tsp basil
1/2 tsp red pepper/chili flakes
2 tsp. everyday seasoning (Trader Joe's version combines sea salt, mustard seeds, black peppercorns, coriander, onion, garlic, paprika, and chilli pepper - talk about a spice medley)
1 bay leaf
Olive oil
Salt and pepper to taste

Vegetables:
4 medium carrots, peeled and sliced in rounds
1/2 onion, diced
3 celery stalks, sliced
4 baby potatoes, quartered or in sixths
2 c. leeks (I used pre-sliced frozen, slice if fresh)
1 c. peas
2 handfuls chopped kale
1-14.5 oz. can diced low sodium tomatoes
1-32 oz. container low sodium vegetable broth

Prepare and cut onion, carrot and celery then add to a stock pot with ~1 tbsp. olive oil. Saute for a few minutes until the vegetables begin to soften. Add minced garlic and potatoes. Stir and season with basil, salt, pepper and 1 tsp. everyday seasoning.

Saute for another few minutes then add in tomatoes and the remaining tsp of everyday seasoning. Add broth, bay leaf and red pepper flakes. Simmer for 20 minutes.  Then add frozen peas, leeks and kale. Simmer for an additional 5 minutes.

For added flavor serve with a sprinkle of parmesan cheese on top!

Wednesday, August 1, 2012

Spinach Artichoke & White Bean "Endive Dippers"

As healthy as endive spears are, tortilla chips are fun too... (featured - Trader Joes Veggie & Flax Seed Chips)
Last week while standing in line for salad at one of my favorite grab-and-go lunch spots, I couldn’t help but overhear a woman crafting her own salad packed with vegetables and…cannoli beans. Clearly she had Italian desert and not healthy salad fixings on the brain. While fighting back the giggles, I got to thinking about other ways I could incorporate white beans, or cannellini beans, into recipes.

One thing led to another and here we are with endive dippers in one hand and spinach artichoke and cannellini bean dip in the other.

The artichoke added a nice creaminess to the dip, while the spinach provided the green boost; white beans injected fiber and protein and rosemary the nice flavor. I guess it shouldn't come as much of a surprise, but the dip did remind me somewhat of hummus.


This recipe can be as simple as a quick rinse of the beans and a toss of everything in the blender, or it can involve some light sautéing before combining. Either way, it is destined to be a hit. Pita chips, tortilla chips or crackers work for serving too.

The recipe: 
3  large garlic cloves, chopped
1/4 c. red onion
4 cups baby spinach
Juice of 1/2 lemon
1 tbsp balsamic vinegar
1 can artichoke hearts, drained and rinsed
1 can white beans, drained and rinsed
2 tbsp fresh rosemary
3 tablespoons Parmesan cheese
1 tablespoon olive oil + oil for cooking
1/2 teaspoon ground pepper

In a large nonstick skillet, heat a drizzle of olive oil over medium heat. Add the garlic and onion and cook until fragrant, about 1 minute. Add 1/2 of the spinach and cook for 2 minutes until wilted. Repeat with the remaining spinach. Let the mixture cool for a few minutes.

Place the spinach mixture, a tbsp of olive oil, cannelloni beans, lemon juice, balsamic vinegar, rosemary, parmesan and pepper in the bowl of a food processor. Blend until the mixture is smooth. Transfer to a small serving bowl. Serve with endive spears.


Wednesday, June 20, 2012

Summer Salad: Kale, Avocado & Grapefruit with Ginger Dressing

Well, I think it's safe to say that although summer is still officially a day away, the dog days have arrived. When temperatures are flirting with 100 degrees there isn't much that comes to mind besides frozen yogurt (fro-yo), which since moving to NYC has earned a special place in my heart. I am especially fond of the serve yourself venues where it is perfectly OK to mix 3 flavors in my dish so I can try them all! Despite the love affair, a certain level of practicality sets when when I also realize that I still need to get some nutrients. (Don't tell my mom, but I actually crave greens and veggies these days).
Summer is a great time to take advantage of using light and fresh ingredients in dishes that leave you feeling satisfied. So when the flavor combination of kale, grapefruit and avocado dawned on me, I was actually pleasantly surprised to discover that another food blogger was one step ahead of me. I was especially fond of the ginger dressing idea, which offers a wonderful contrast, especially with its citrusy notes.

I used to hesitate when it came to the lemonhead-face-inducing fruit better known as grapefruit, but I have actually come to enjoy it and when paired with the kale, avocado and ginger dressing, the potentially overpowering flavor is somewhat toned down. Still not convinced? Go for a sweeter variety of grapefruit.

I did slightly tweak some of the proportions, but of course, feel free to try the original recipe as well.

The recipe:
3 C. Raw Chopped Kale, stems removed
1 Grapefruit
1 Small Avocado

Ginger Dressing:
1 tsp. Freshly Grated Ginger
1/2 tbsp. Extra Virgin Olive Oil
1 tbsp. low sodium soy sauce
Juice of 1/2 Lemon
1/2 tbsp. Agave 

Salt and pepper to taste

Place the chopped kale in a large bowl and set aside. Combine the dressing ingredients in a small bowl and mix with a whisk.

Add the kale to a large bowl and mix in the dressing for 1-2 minutes until the kale is tender and the dressing has absorbed. Set the kale aside.

Prepare the grapefruit by removing the skin. (Depending how clean of a look you are going for, you can either just peel the skin off or cut away all the skin and whites). Next, cut the grapefruit segments apart (these are called supremes) and cut each supreme in half. Slice the avocado into small, bite-sized pieces and then add the grapefruit and avocado to the large bowl of kale.

Mix it all together and serve. Season with pepper and (some) salt as desired. Side note: feta cheese makes for a nice garnish.

Sunday, June 10, 2012

Zucchini & Carrot Ribbon Salad with Heirlooms and Thyme Oil

Well the good news is that I'm back to the blog. The bad news...battling chronic writers block...

When I think of zucchini, the first thing that comes to mind is my grandmother's garden in the summertime. Inevitably there would come a point when the overgrowth of zucchini caused my aunts and uncles to compare notes on who had received more and who could still stand to have a few pounds pawned off on them. 

The good news about the excess is that there are a multitude of zuchinni recipes worth trying. On the deceptively unhealthy, but delicious end of the spectrum we have zucchini bread (myth busters here). On the other hand we have raw salads, which although lower in calories, require a bit of a flavor boost. I was pleasantly surprised by the savory touch provided by the thyme oil. In just 20 minutes, everyday olive oil was transformed into an herb infused delicacy!
On the road to exploring new cooking techniques, I decided to purchase a mandolin to help with the ribbon creation. An everyday vegetable peeler proved to be easiest for the carrots, but after a few practice runs with the zucchini, I was able to get the rhythm of cutting on the mandolin. Mission accomplished! With that said, a vegetable peeler will work just fine for the zucchini too.

Thyme sprig carcasses (I decided to work some of the remaining leaves off the sprigs and keep in the oil).


The recipe:
(Adapted from Martha)
1 generous handful fresh thyme sprigs (about 1/2 ounce)
1/4 cup extra-virgin olive oil
1/2 teaspoon finely grated lemon zest, plus 2 teaspoons fresh lemon juice
2 baby zucchini (or 1 large), thinly shaved
3 carrots, thinly shaved
1 cup mixed heirloom tomatoes, cut in half crosswise (1 cup)

1/4 c spinach, roughly chopped
1/4 cup fresh basil leaves, torn if large, plus more for sprinkling (optional)
Pinch of red-pepper flakes
1/4 teaspoon coarse salt
Coarsely ground pepper
3 ounces fresh ricotta (1/3 cup)
Balsamic Glaze (now sold at Trader Joes!, also found at whole foods)


Place thyme on a cutting board, and bruise with the dull edge of a knife. Place thyme and oil in a small saucepan. Cover, and heat over medium heat until small bubbles appear. Turn off heat, and steep thyme, covered, 20 minutes.  

Meanwhile, slice the remaining ingredients and add into a separate bowl. 

After the 20 minutes, discard thyme sprigs, leaving loose thyme leaves in oil. Whisk together lemon zest and juice and 3 tablespoons thyme oil (reserve remaining oil for another use; it can be refrigerated up to 2 weeks).

Combine the dressing with the zucchini, carrot, tomatoes, spinach, basil, red-pepper flakes, and salt. Season with pepper, and toss. Divide half the salad between 2 plates, and dot with half the ricotta. Top with remaining salad and remaining ricotta. Drizzle with balsamic glaze.

Monday, February 6, 2012

Snack Time: Baked Chickpeas

Neglect: The passing of three weeks before writing in my food blog. Sorry readers, for the next few months you might have to get used to it. Work has been nothing short of intense to start the year, while attempting to study for the CFA, keep up with friends/family, etc...you get the point!


Anyway, here is a quick one to break the hiatus. As much as I love cooking, I also like variety, so as a result, I sometimes wind up with ingredients that run the risk going bad and to waste...never something I like to have happen. So as therapeutic as cooking is for me and as much as I'd like to think my brain shuts off when I'm not at work or studying, even cooking becomes a problem solving exercise! Case in point: baked chickpea snacks. I love having chickpeas in my salads, but they do tend to go bad after a few days of sitting in the fridge. This simple recipe is an easy fix to that problem and the end result is a great crunchy snack that doesn't even require a full-sized oven. I used my trusty little toaster oven. If the low maintenance recipe wasn't enough to convince you to try them, Chickpeas are also a very good source of folic acid, fiber, rich in iron, copper, zinc, and magnesium AND are a good source of protein. The recipe:
-1 can (or what remains of the can) of Chickpeas (Garbanzo Beans)
-Cooking spray or Olive Oil to very lightly coat-
Seasoning of your choice - I used primarily Tony's Creole, but this is your opportunity to get creative
-Salt


Preheat oven/toaster oven to 400˚F.
Drain chickpeas and rinse under cold water. Lay out on paper towels and pat dry with paper towels on top, roling around to remove the chickpea shells as you go.

Toss chickpeas with a small amount of oil, spices, and salt . Put them on a baking sheet in a single layer.

Bake for about 30-40 minutes until golden brown and crunchy. Toss and rotate about every 10 minutes.

They get crunchier after they cool so allow them to sit for a bit. Store in an airtight container at room temperature.

Monday, January 16, 2012

Tomato Basil Quinoa Soup with Kale


Tis the season for me to be perpetually cold. As a dedicated beach bum, winter can be a difficult time of year, so I am constantly seeking out ways to get back to a state of warmth. One of the most comforting ways to kill the chill, aside from a warm latte, is none other than a comforting bowl of soup. The idea for this recipe came from my source of constant inspiration - Whole Foods, where Tomato Pesto Quinoa soup has earned a spot at the soup counter. From the moment I saw the new offering, I knew I had to have it and the first bites on a cold evening did not disappoint.
My own rendition of the soup includes some supplemental green in the form of kale and while I can't claim to have found the secret to WF's amazing soup, I was quite pleased with the outcome of my kitchen experiment.
I hope you aren't sick of the familiar sight of quinoa on the back burner, but it has found its way into yet another therapeutic dish.
The recipe:
1/3 cup quinoa, rinse in strainer well
1 tsp. salt
1 cup water
1 (28-ounce) can crushed tomatoes in puree
2 tablespoons extra-virgin olive oil
l 1/2 cup chopped white onions
2 garlic cloves, minced
½ teaspoon freshly ground black pepper
1 teaspoon sugar
2 cups chicken broth (if you are buying it, get organic)
3 cups kale
1 cup loosely packed fresh basil leaves
2 tablespoons freshly grated Parmesan cheese

In a small saucepan, combine the quinoa, water, and salt. Bring to a boil over high heat. Reduce the heat to low, cover, and simmer for 15 to 20 minutes, or until the water is absorbed and the grains are translucent and begin to uncoil. Set aside.

In a saucepan, heat the oil over medium-high heat. Stir in the onions, garlic, pepper, and sugar and sauté for 5 to 6 minutes, or until the onions are tender and light golden.

Stir in the crushed tomatoes and broth. Increase the heat to high and bring to a boil. Reduce the heat to medium-low and simmer, uncovered, stirring occasionally, for 15 minutes, or until the soup is slightly thickened. After about 10 minutes add in kale.

To serve, fluff the quinoa with a fork and stir into the soup along with the basil. If desired, add additional salt, pepper, dried basil to taste. Top each serving with about 1 tablespoon of parmesan and basil leaves to taste.

Wednesday, December 21, 2011

Wasabi Pea Crusted Tofu with Bok Choy and Ponzu-Soy Dipping Sauce

How does one come to enjoy eating tofu? Well, after severely abusing chicken on the George Foreman grill during my sophomore year of college, I cut myself off from the protein and decided to make the switch to tofu. I have since reintroduced chicken into my cooking rotation, but for about 2 years my go-to was the spongy scary white blob that many prefer to avoid.

While my use of the ingredient often leads to a stir-fry of some sort, I'm always on the hunt for ways to feature tofu as the main event. When I came across a recipe for pistachio crusted tofu, the hunt was over. I decided that a twist on the idea would be a great direction for my first tofu blog post (I can't believe it has taken so long!). Instead of using pistachios, the accompanying ingredient would be, drum rollll...wasabi peas!

Interestingly, wasabi as we know it in the US is really just a colored horseradish-based substitute, rather than the expensive and difficult to cultivate root vegetable found in Japan. "Western wasabi" is often found alongside sushi and sashimi or in this case, incorporated into a coating on green peas. Usually famous for their heat, this particular variety of wasabi peas did not have quite as much kick to them as others I have tried, however I still enjoyed the flavor they added to the tofu. I'm sure blending with some additional wasabi powder or paste would have solved the heat dilemma.

One of the funniest memories I have of tofu is my mom trying to get me to eat it in 4th grade through some sneaky tactics. By putting the tofu in "burger" form she managed to trick me...at least for a few bites. But with dessert on the line, I had to find a way to get through the meal. This phase of highly nutritious, tofu laden dishes often left my dad craving a greasy Whopper every now and then, but he too has come around.

One reason that I love cooking with this food that so many find repulsive is that it's very easy to transform the flavor into whatever you want. Almost like a blank canvas that gives you the artistic freedom to go to work. In this case I thoroughly enjoyed the added flavors of both the wasabi peas and the ponzu dipping sauce, which really added a memorable finishing touch.
As you know by now, adding green to my plate completes the meal for me. Bok choy is always a wonderful complement to tofu dishes so I opted to use it once again.The recipe:
(Adapted from Epicurious)
1/2 block firm tofu
1/2 c. ponzu sauce
2 cloves garlic, minced
1/2 cup wasabi peas
1 tsp. pepper
1 tsp. sesame oil
1 tsp. soy sauce

Bok Choy:
2 heads baby bok choy
1 clove garlic, minced

Begin by draining the water from the tofu package and slicing the tofu block down the middle (long side). Return the unused half to the package, cover with some water and plastic wrap, unless doubling this recipe. Slice the remaining piece in half again and then form triangles from the 2 large rectangles. In reality you can do any shape you'd like.

Place the pieces of tofu between paper towels to absorb the excess water.

Mince the garlic and set aside the equivalent of one clove for the bok choy. Add the remaining garlic to a shallow dish with ponzu sauce. Then set the pieces of tofu in the dish. Be sure the tofu is at least partially covered and allow to marinate for about 15 minutes, turning halfway through.

Meanwhile, prepare the bok choy by simply washing and slicing the baby bok choy to the desired size and then saute over medium heat until softened. Pour the wasabi peas into a mini food processor and blend into a powder form. Once blended spread on a plate with the pepper.

Once the tofu is done marinating, dip the pieces in the wasabi pea powder to coat each side then saute in sesame oil over med-high heat until golden brown.

Reserve the ponzu marinade and combine with soy sauce for a delicious dipping sauce.

Sunday, December 4, 2011

Spaghetti Squash Fritters with Yogurt Chive Sauce

In another wave of squash inspiration, I decided to do some experimenting with spaghetti squash. My mom first introduced me to the vegetable a number of years ago and I still to this day think it's a bit strange and unexpected...which I'm sure my college roommate would attest to given the look on her face the first time I cooked with it in our apartment. It makes for a great pasta stand-in, however, instead of "pasta", this time around I decided to attempt a fall version of a summer favorite, zuchinni fritters.
Zuchini fritters made their way into my repoitorie this summer after a Saturday stroll through my local Whole Foods, where they have made a tradition of hosting "Saturday Smackdowns". Each week a new feature ingredient is incorporated into a recipe in each of the different departments, which shoppers can then sample and vote on. One thing that caught my attention about the fritters was the use of chickpea flour instead of regular flour, which I decided to also adopt for my recipe. It might appear I have a mild obsession with everything chickpea, but the flour is high in protein, fiber, iron and is gluten free - who's complaining?
Aside from the cooking time to get the squash to its characteristically stringy, spaghetti form, the recipe was very quick and easy. I rarely am completely surprised by the outcome of the dishes I concoct, but the pairing of the squash with the fresh sage and other ingredients made for a delightfully light savory evening treat.
The recipe:
2 cups cooked spaghetti squash or 1/2 of a whole spaghetti squash)
1/4 cup chickpea flour
1/3 cup chopped onion
1 1/2 tablepsoons chopped Fresh Sage
1/8 teaspoon Nutmeg
2 teaspoons Garlic, minced
1/2 teaspoon Freshly ground Pepper
1 egg
1 tbsp canola oil

Chives
Plain greek yogurt
Salt & Pepper

Preheat the oven to 375 degrees. Cut the squash in half and remove the seeds. Roast, cut side down, on foil-lined, cooking sprayed baking sheet for ~35 minutes. Allow the squash to cool. With a fork, scrape the squash strands into a strainer resting over a bowl. Sprinkle with salt to help draw out the excess water. Meanwhile prepare the other ingredients, then squeeze the remaining water from the squash.

In a medium bowl, combine the squash spaghetti, sage, grated nutmeg, onion, garlic and pepper. Stir in the egg and flour and mix well until combined.

Form fritters by hand or using a 1/4 cup measure and sauté them in a pan using canola oil. Cook until the fritters are golden brown on each side, 4 to 6 minutes. After the fritters have cooked for a couple minutes. Place fritters on paper towels to absorb the excess oil.

To prepare the yogurt chive dip, mix together plain greek yogurt, chopped fresh chives, salt and pepper to desired flavor.

Sunday, November 27, 2011

Baked Falafel with Cucumber Sauce


With the growing popularity of food trucks in New York City, many have taken it upon themselves to dabble in the diverse cuisines now available. From waffles to Korean BBQ, there doesn't seem to be anything these trucks won't whip up. However, before the advent of the trendy food truck, food carts stuck to the basics of halal and hot dogs and many hungry midtowners have not turned their backs on these staples. This is where my enthusiastic colleagues come in.

I was once told that you can say anything you want as long as you follow it with "bless her soul", so to my colleagues that regularly bring the distinct smell of "street meat" into the office, bless their souls. To be quite honest, I don't mind the smells so much anymore and frequently enjoy hearing "I am the King of Rafiqi's" (a popular food cart) shouted across the office. And while I do not partake in these food truck/cart lunches, I do still appreciate the types of food they serve...on my own terms.

I'm not sure when exactly it was that I discovered my love of Mediterranean food, but I have come to savor the intensely flavorful dishes of the cuisine. As these discoveries tend to go, when I love a food, I want to learn how to make it myself, so a little over a year ago, I found a falafel recipe that is so phenomenal, I now think my homemade version tastes better than many restaurants! Call me a falafel snob, but it is what it is. This particular recipe combines very healthy amounts of spices to create a savory, delightful end result and the added bonus - I actually know what is going into the mixture. The double bonus, they are baked, rather than fried, so I like to think they maintain a high level of nutritional value.

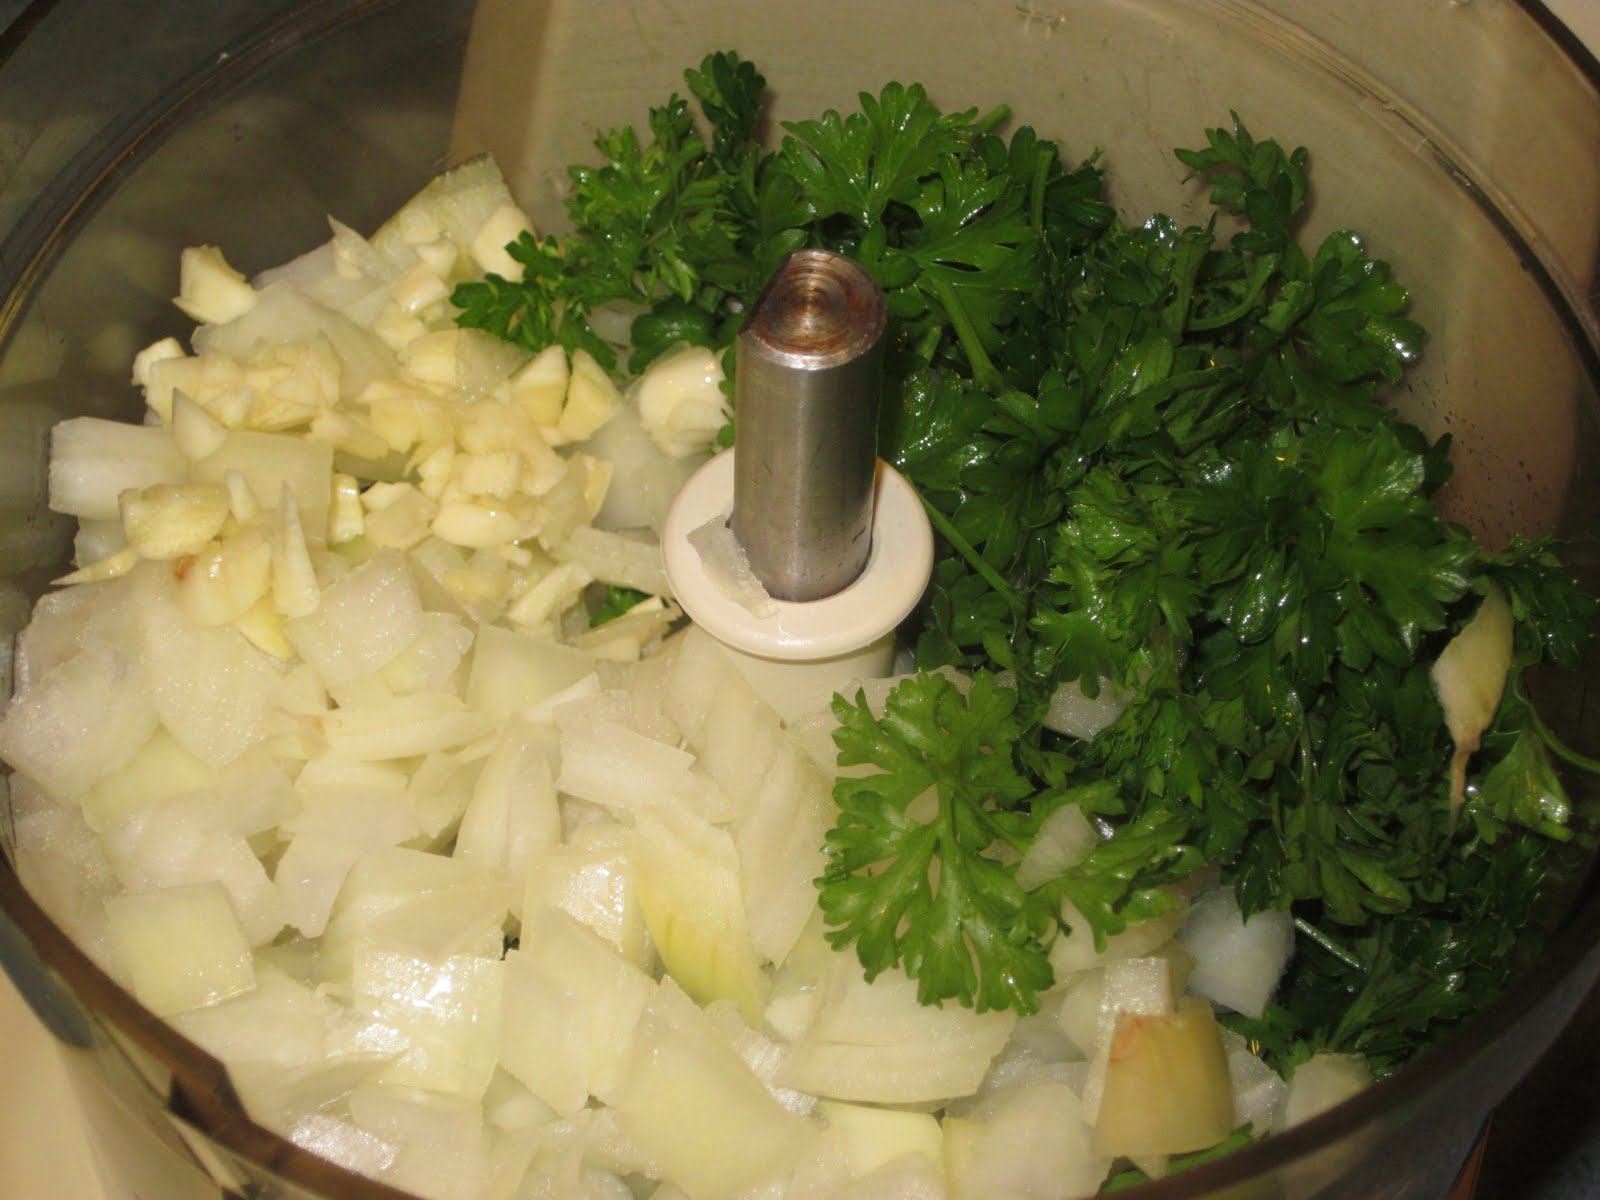
I have made this recipe a few times now, and after an incident with my blender breaking down the last time, I decided to take full advantage of my mom's functional food processor while home for Thanksgiving to make it once again. (Attempting to get parsley, onion, and garlic into a "puree" form with a knife proved to be a time-consuming and dismal task).

One other potentially problematic step is mashing the chickpeas by hand. A fork or potato masher are your best bet for this operation. Though I have never actually tried, I imagine really tough-to-mash chickpeas could be soaked in warm water for a while to help soften them up.
I did make a few adjustments from the original recipe, including replacing the bread crumbs with a healthier option. I have tried the recipe with both FiberOne bran cereal and most recently Kavli Crispbread, both of which I like, but can change the flavor very subtly. Considering I am the main consumer of my creations, I'm willing to experiment and do enjoy the healthy swap. I also nixed the mayonnaise from the cucumber sauce, because it is plenty tasty without it.

When all is said and done, these falafel, in addition to tasting great with just the cucumber sauce, make great pita sandwiches (+ baby spinach and feta cheese) or they also work well in salads.

The recipe:
(Adapted from Sean's Falafel)

1 (15 ounce) can chickpeas (garbanzo beans), drained and rinsed under cold water
1 onion, coarsely chopped
1/2 cup fresh parsley
2 cloves garlic, coarsely chopped
1 egg
2 teaspoons ground cumin
1 teaspoon ground coriander
1 teaspoon salt
1 dash pepper
1 pinch cayenne pepper
1 teaspoon lemon juice
1 teaspoon baking powder
1 tablespoon olive oil
1 cup dry bread crumbs/healthy substitute

Cucumber Sauce:
1 (6 ounce) container plain yogurt
1/2 cucumber - peeled, seeded, and finely chopped
1 teaspoon dried dill weed
salt and pepper to taste


In a large bowl mash chickpeas until thick and pasty; don't use a blender, as the consistency will be too thin.

In a blender or food processor, process onion, parsley and garlic until smooth. Stir into mashed chickpeas.

In a small bowl combine egg, cumin, coriander, salt, pepper, cayenne, lemon juice and baking powder. Stir into chickpea mixture along with olive oil.

Slowly add bread crumbs until mixture is not sticky but will hold together; add more or less bread crumbs, as needed.

Form falafel balls - I made each about 1 inch, but this is up to you. Spray a foil lined cookie sheet with cooking spray and place the falafel balls on the tray. Bake at 400 degrees for 10 minutes, turn the tray 180 degrees and bake for another 5-10, until the falafel balls are browned on the surface.

In a small bowl combine yogurt, cucumber, dill, salt and pepper. Chill before serving.