Showing posts with label Sweet Tooth. Show all posts

Sunday, September 15, 2013

Meyer Lemon Olive Oil Cake


Let's talk olive oil and baked goods.

Until a few months ago, my only encounter with olive oil used in baking was an accident. During college, one of my roommates made cupcakes from a box mix and assuming all oils are created equal, mixed olive oil into the batter. Well needless to say, the rest of us in the apartment had a field day with this little mix up and continued to joke about the olive oil cupcakes for years to come.

Fast forward to my 25th birthday, which I celebrated at Rosemary's - a great Italian spot in Greenwich Village. After an amazing Italian feast, the waitress brought us one final treat for our taste buds. The treat was  none other than their signature olive oil cake....guess the joke is on me!


For those who don't know, a Meyer Lemon is a cross between a regular lemon and a mandarin orange. This combination results in a sweeter tasting lemon - perfect for lemon flavor minus the sour kick. Meyer Lemons have become en vogue in the past few years and now can be found in most grocery stores. I recalled seeing a Meyer Lemon version of olive oil cake while paroozing different blogs, so with the itch to make an olive oil cake, I decided this would be the perfect application. I also was about to get in trouble with my roommates if the Meyers my mom so graciously gave me a week ago continued to take up space (and slowly deteriorate) on our kitchen counter. 

This cake is not overly sweet, but the citrusy notes make for a palate pleaser. The use of cake flour and the proportions of egg, oil and yogurt create a light, airy, yet moist texture. I'm officially a believer in olive oil desserts!

Note: Tastes best after it has been removed from the oven and has cooled for about 20-30 minutes. The cake becomes more dense the longer it goes uneaten! 


The recipe:

1 3/4 cups of cake flour* (see substitute below)
2 teaspoons baking powder
Pinch of salt
1 cup granulated sugar
Zest of 2 Meyer lemons
3 eggs
1/4 cup lemon juice (from ~2 lemons)
Scant 1 cup whole-milk plain yogurt
2/3 cup Extra Virgin Olive Oil
¼ cup powdered sugar to sprinkle on top of the cake
Sift together the flour, baking powder and salt and set aside.
Remove from the oven and cool for 20 minutes. Remove from the cake pan and cool completely. Dust with powdered sugar.

*If you do not have cake flour on hand, or do not want to buy any, substitute with all-purpose flour and corn starch. Measure out flour, remove a scant 2 tbsp of flour and return to the container. Measure out a scant 2 tbsp of cornstarch and add to the flour. Sift the new flour mixture 3-5 times so the flour and cornstarch are fully incorporated. 

Preheat the oven to 375°F. Grease a 9 1/2 cake pan with olive oil, then dust it with flour.

Add the zest to the granulated sugar and rub together to infuse the sugar with the zest’s lemon flavor. Add eggs to sugar mixture and beat together for about 2 minutes until the mixture has lightened in color and grown in size. (If you have an electric mixer use whisk attachment for 2 minutes).

Whisk in the lemon juice and yogurt. Slowly pour a stream of olive oil into the mixture and continue to stir until combined. Mix in flour a small amount at a time until the mixture is combined.

Pour the batter into the prepared cake pan and bake for 40-50 minutes.

Tastes best served warm.


Thursday, September 27, 2012

Semi-Homemade: Black & White Cookies


I have an embarrassing confession. As I sit here preparing this post, on one tab I have open the recipe page for the Paleo diet and on the other tab, the wiki page for black and white cookies. I guess this perfectly exemplifies the dichotomy that is my diet. 
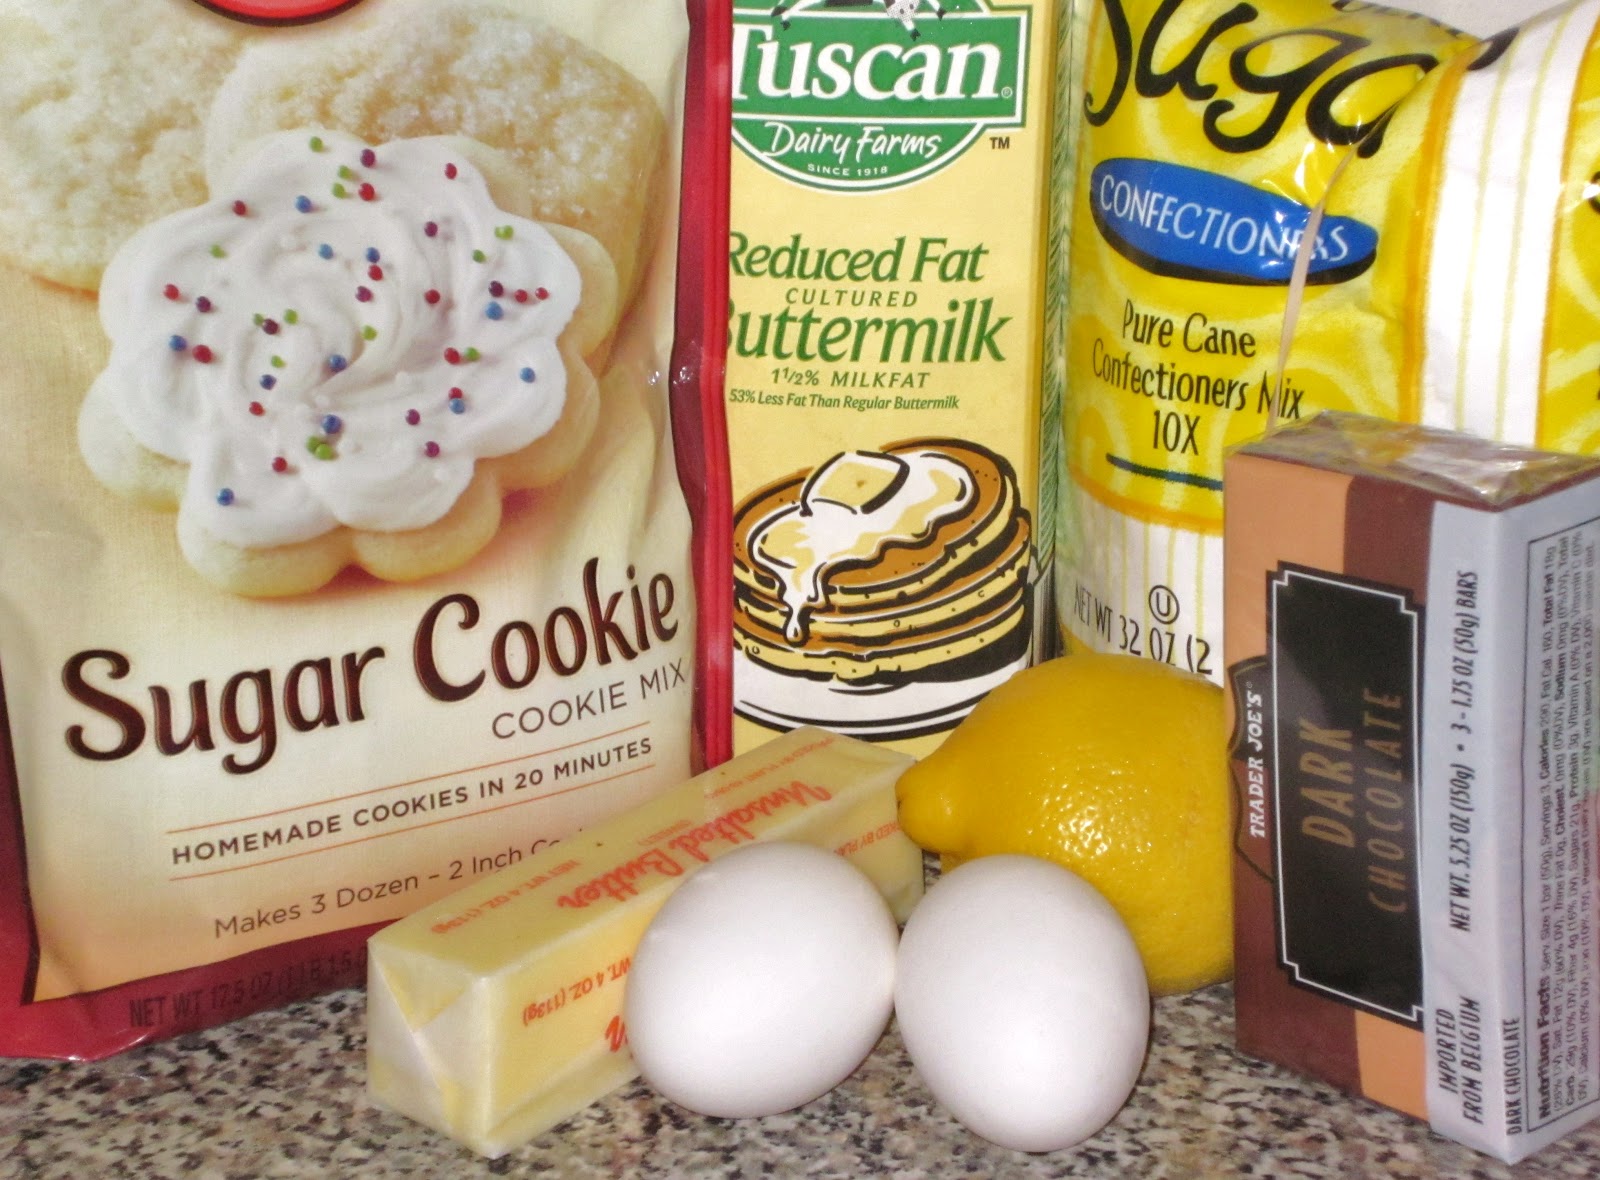
Prior to becoming a resident New Yorker, and one who can now tell you we have Jerry Seinfeld to thank in part for making thse cookies famous, I spent a summer soaking up my final weeks of freedom. Naturally, this allowed for plenty of down time, so in between trips to ikea, I discovered that Betty knows the secret for transforming a plain jane bag of sugar cookie mix into a mean Black and White cookie.
So whether you eat the chocolate or vanilla side first, or head straight to the middle to get the best of both worlds, these treats don't disappoint. The sweetest part about it - the simplicity of the batter.

The recipe (Thanks Betty)

Cookie
1 pouch (1 lb 1.5 oz) Betty Crocker® sugar cookie mix
1/2 cup buttermilk
1/4 cup butter or margarine, softened
1 teaspoon grated lemon peel
2 eggs

Icing
3 cups powdered sugar
1/4 cup whipping cream
2 tablespoons butter or margarine
1/2 teaspoon vanilla
1/3 cup dark chocolate chips (2 oz)
1 tablespoon whipping cream

Heat oven to 350°F. In large bowl, stir cookie ingredients until batter-like dough forms.

With medium cookie scoop or heaping tablespoon, scoop dough 3 inches apart onto ungreased cookie sheets.

Bake 12 to 15 minutes or until edges are light golden brown. Cool 5 minutes; remove from cookie sheets. Cool completely.

Place powdered sugar in large bowl; set aside. In small microwavable bowl, microwave 1/4 cup cream and 2 tablespoons butter on High about 1 minute; stir until butter is melted. Add butter mixture and vanilla to powdered sugar; stir until mixture is smooth.

In medium microwavable bowl, microwave chocolate chips and 1 tablespoon cream on High 1 minute; or until melted. Stir half of vanilla icing into melted chocolate mixture until smooth and well blended. If necessary, add additional cream to thin both vanilla and chocolate icing.

For each cookie, turn cookie flat side up; spread chocolate icing in thin layer on half of cookie. Spread other half with white icing. Store covered at room temperature.


Saturday, July 14, 2012

Speculoos Rice Krispie Treats with White Chocolate Drizzle

Discovering new ingredients can be both a blessing and a curse. Take for example Trader Joe's Cookie Butter - a take on Speculoos spread (which essentially tastes like teddy grahams in spread form). I have officially proved that I am incapable of exercising enough self control to keep a jar of this magical spread around my apartment. 

While I would be perfectly content to just eat spoonfulls of cookie butter (come on, who hasn't eaten a spoonful of straight peanut butter at some point - same thing), I don't think it ranks too high on the scale of socially acceptable actions.

My solution was to instead keep a container at work for both myself and my colleagues to enjoy (I figured judging eyes - within 3 ft on either side of me - would prevent overindulgence). Despite this solution, I still knew I wanted to craft a Speculoos dessert; one fateful day the skies parted and it dawned on me, SPECULOOS RICE KRISPIES! While it turns out I wasn't the first one to come up with this brilliant combination, I was nonethless still excited to try it.

I think these treats received the coworker stamp of approval, as proven by the empty plate sitting on my desk!


The recipe:
4 tablespoons butter
1 bag (10.5 ounces) miniature marshmallows
½ cup cookie butter
5 cups Rice Krispies cereal
½ cup white chocolate chips + ¼ cup for drizzle
1 tsp. milk or cream

Line a 9inch baking pan with parchment paper and coat with non-stick spray; set aside ( I used about a 6x12 pan which worked fine as well). 

Melt the butter in a large saucepan over low heat. Add the marshmallows and stir until completely melted - be patient. Stir in the cookie butter until melted. Remove from heat.

Add the Rice Krispies cereal and 1/2 cup white chocolate chips. Stir until well coated. Spread the rice krispies into the pan and using a piece of wax paper, evenly press the mixture into the pan. 

Meanwhile, add 1/4 cup white chocolate chips and milk/cream to a dish and melt in the microwave. Drizzle over top of the rice krispies. Allow to sit at room temperature for about 30 minutes, or until set. Cut into squares and serve.

Tuesday, June 12, 2012

Quick Caramel Popcorn

 
What happens when Orville Redenbacher and Mrs. Richardon get together? Instant gratification. For some reason it never occurred to me that caramel corn would be so easy to make at home...this could prove to be a very dangerous discovery. I guess the good news is that for now I am out of both popcorn and caramel sauce.

  Shockingly this recipe weighs in at less than 250 calories. Stop drooling and go make some!


The recipe:

100 calorie size bag of popcorn
2 tbsp caramel sauce (I used Mrs. Richardson's Butterscotch Caramel)

Preheat toaster oven to 250 degrees. Prepare popcorn as you normally would in the microwave. Transfer popcorn to a foil lined try and drizzle half of the caramel sauce on top, mix up with a wooden spoon, drizzle remaining sauce over the popcorn and mix again. Place the tray in the toaster oven for 10-15 minutes.

Remove from the oven and allow to cool for as long as you can stand (1-2 minutes) and enjoy!

Sunday, March 4, 2012

Oreo Cheesecake Cupcakes

Note to self: refrain from making delicious treats when your lenten sacrifice is sweets! I happened to come across these gems during one of my occasional scans through a few favorite food blogs and instantly I knew I had to make them.
At work, my group has instated the tradition of taking a short break out of the day to celebrate each of our birthdays. I was on treat duty this time around...and decided to test my ability to resist temptation (at least until Sunday).

I opted for a reduced fat version of the original and the result was still a big hit - as proven by my coworkers coming back for seconds, creating a cheesecake cupcake with a not too sweet, not too creamy taste. The recipe itself was very simple and I would definitely not hesitate to make these little devils again.

The recipe:
(Inspiration: Handle the Heat)

1 package of Reduced Fat Oreos, 24 left whole, remainder coarsely chopped
3-8oz. packages reduced fat cream cheese, room temperature
3/4 cup sugar
1 tsp vanilla extract
3 large eggs, room temperature, lightly beaten
3/4 cup sour cream
Pinch of salt

Preheat oven to 275 degrees. Line standard muffin tins with paper liners. Place 1 whole cookie in the bottom of each lined cup.

If you have an electric mixer, use it. Otherwise, arm strength will have to suffice. Mix cream cheese until smooth, scraping down sides of bowl as needed. Gradually add sugar, and stir until combined. Mix in vanilla.

Add in eggs, a bit at a time. Add in sour cream and salt. Meanwhile, crumble remaining cookies in a plastic bag (I also used a rolling pin). Then stir in the chopped cookies by hand.

Divide batter evenly among cookie-lined cups, filling each almost to the top. Bake, rotating pan halfway through, until filling is set, about 22 minutes. Transfer to wire racks to cool completely.

Refrigerate at least 4 hours (or up to overnight). Remove from tins just before serving.

Sunday, December 11, 2011

White Russian Cupcakes

For mature audiences only!
With the cupcake craze that's been sweeping the nation for the past several years, it's a mystery to me why cocktail cupcakes haven't been at the forefront. Finally, you can have your alcohol and eat it too!

One fateful day at work, a girl in my group introduced our team to Irish Car Bomb Cupcakes and there was no turning back from there. My mind immediately started racing, wondering how to make my own version of these alcohol-laced cupcakes. After a very productive brainstorming and googling session with one of my would-be-cupcake victims, I settled on the White Russian inspiration (runner up: Caramel martini cupcakes).

The recipe is undoubtedly very decadent, but the end result was so delicious. I'm sure my basketball teammates (the recipients) would vouch for them and would also maybe argue that I was a bit of a lush when it came to the Kahlua in the buttercream icing...oops!

The cupcake recipe in and of itself was pretty straightforward, but interestingly it called for instant pudding mix, which made the cupcakes extra moist and spongy (in a really good way).

Combining a few recipe ideas, I decided to fill the cupcakes using some newly purchased decorating tools. I settled on Irish Cream filling, which certainly did the trick, though I refuse to ever manually whip heavy cream into a solid state again without the help of an electric appliance. Despite my frequent trips to the gym, my arms just are not cut out for that.

The finishing touches were piping on the Kahlua buttercream icing and dusting with some chocolate shavings. Sugar coma accomplished.

The recipe:
Cake mix (Vanilla, 18.25oz)
Sugar-free, fat-free instant vanilla pudding (1.7oz)
1 c. vegetable oil
3/4c. milk
4 large eggs
1/4 c. vodka
1/4 c. kahlua + 2 tbsp.
1 tsp. vanilla

Irish Cream Filling:
8 oz. heavy cream
4 oz. Irish liquer (Bailey's)

Kahlua Buttercream Icing:
1 stick butter
3 c. powdered sugar
3-4 tbsp. Kahlua (or my preferred method, to taste)
Pinch of salt

Preheat the oven to 350 degrees. Mix together all ingredients for the cake into a bowl, setting aside the 2 tbsp of Kahlua for later. Scoop about 1/3 c. batter into each cup (they should be about 2/3 full) and bake for 17-20 mins. Allow the cupcakes to cool for 5 minutes, then brush the tops with the remaining Kahlua.

Meanwhile, make the filling by whipping the heavy cream until it begins to thicken. Continue mixing and slowly add in the Bailey's. (This is all best served using an electric mixer of some sort).

Then make the icing by creaming the butter and adding in powdered sugar, salt and Kahlua.

To fill the cupcakes, use a pastry bag and long nozzle/decorating tip. Insert the tip and squezze in the filling while pulling the bag up away from the cupcake. Then, to ice the cupcakes, use a pastry bag again and squeeze out icing following a circular motion until the top is covered. Using a grater/zester, garnish the cupcakes with chocolate shavings.

Tips: Keep the cream filling and the icing refrigerated until you are ready to use them. Also, I would recommend refrigerating the cupcakes after so the alcohol doesn't cause the icing to start melting.

Monday, November 21, 2011

Thanksgiving: Practice Round

Stuffing, Cranberry Sauce & DessertDisclaimer: This is a long one.

While enduring a long car ride back to NYC through Middle-of-Nowhere, Pennsylvania, my mind got to wandering about food, the mouth-watering Thanksgiving feast my aunt and uncle prepare every year, and my minimal involvement in the operation. So with that in mind, I posed the idea of a "Thanksgiving practice round" potluck to my roommates. We determined that our poor little oven would cease to function at the sight of a turkey, so we got some help in that department, but once the remaining responsibilities were divvied up, it was time to get to brainstorming. My main task - the stuffing. With so many fantastic recipes out there it was a tough choice, but I settled on a slightly modified version of Fennel, Sausage and Caramelized Apple Stuffing from Cooking Light. Upon subscribing to CL, my close friend in media broke the news that the average reader was ~25 years my senior (ha!), but I have to say I've been thoroughly pleased with the recipe ideas thus far.
When I arrived at Whole Foods to pick up a few last ingredients, I was helped by the lady at the bakery counter who handed me a loaf of sourdough bread fresh from the oven. Now normally this would be a welcomed predicament, but I was a bit concerned about just how fresh (and still hot) the bread was - considering stuffing usually calls for at least day old bread. I decided to trust the recipe and go with it. Low and behold, the fresh bread, which ends up going in the oven to brown and crisp the edges, creates a similar effect to day-old without actually being stale.
While the bread was in the oven I went to work on the other parts of the dish aka I slaved away over the cutting board fighting back onion tears and fending off unruly flying carrot pieces.

As I continued to work my way through the recipe and the ingredients piled up in my bowl, all I could think of was Rachel Ray's "garbage bowls", but instead of reducing trips to the trash can, I was reducing the amount of time I would later hover over the sink hand-washing multiple dishes and pans. Yes, hand-washing. Sadly our dishwasher has been yet another victim of repairs our management company doesn't seem to be competent enough to arrange.
Now don't get me wrong, I'm still enjoying leftovers, but a few notes on the ingredients I chose and how I would potentially tweak them. I opted for chicken sausage to cut out some of fat and make the dish a bit lighter, which I am certain I compensated for by unintentionally using extra bread. To that note, I think a whole wheat baguette would've also been a nice choice, but regardless, be sure to keep the bread to 12 oz. so the other ingredients don't get lost. I think I've proven by now that I'm a flavor junkie, so I likely would have added in an extra sage, fennel seed, garlic and pepper. Lastly, the apple flavor was not all that present in the dish, so if that is something you want, I would go for a more "powerful" apple, like a granny smith.


FENNEL, SAUSAGE AND CARAMELIZED APPLE STUFFING
The Recipe:
12 ounces sourdough bread, cut into 1/2-inch cubes
Cooking spray
1 12 oz. package of Chicken Sausage (I used Sweet Italian)
5 teaspoons extra-virgin olive oil, divided
4 cups onion, chopped
1 1/4 cups fennel bulb, chopped
1 1/4 cups carrot, chopped
2 tablespoons fresh sage, chopped
1/2 teaspoon fennel seeds, crushed
5 garlic cloves, minced
1/2 teaspoon freshly ground black pepper, divided
3 cups chopped Golden Delicious apple
2 teaspoons sugar
1 1/2 cups fat-free, lower-sodium chicken broth
2 large eggs

Preheat oven to 400°. Arrange bread cubes in a single layer on a baking sheet coated with cooking spray. Bake at 400° for 16 minutes or until golden, stirring after 8 minutes. Place in a large bowl.

Heat a large skillet over medium-high heat. Cut chicken sausage into small pieces. Coat pan with cooking spray. Add sausage to pan; cook 8-10 minutes or until browned and crispy. Add sausage to bread.

Return pan to medium-high heat. Add 3 teaspoons oil to pan; swirl to coat. Add onion, fennel, carrot, sage, fennel and garlic. Add 1/4 teaspoon pepper; sauté 8 minutes or until vegetables are tender, stirring occasionally. Add vegetables to sausage mixture.

Return pan to medium-high heat. Add remaining 2 teaspoons oil to pan; swirl to coat. Add apple and sugar; sauté 5 minutes or until apple caramelizes, stirring occasionally. Add to the sausage mixture.

Combine broth and eggs in a small bowl, stirring with a whisk. Add broth mixture and remaining 1/4 teaspoon pepper to sausage mixture; toss well to combine.

Spoon sausage mixture into a 13 x 9-inch glass or ceramic baking dish coated with cooking spray. Cover with foil. Bake at 400° for 20 minutes. Uncover dish; bake at 400° for 20 minutes or until browned and crisp.

HOMEMADE CRANBERRY SAUCE
Any magazine I read seems to insist that homemade cranberry sauce is a requirement for Thanksgiving, so in an effort to avoid the canned jelly blob monster, I thought I too would try my luck at making my own. Mission accomplished. Luckily I had onion left over from my earlier chopping frenzy, so the process was low maintenance.
I did cut the sugar in half from the original recipe, which meant I still used 3/4 of a cup. It felt like a lot of added sugar (maybe agave would be a substitute candidate), but it was worth it.

The recipe:
1 tbsp. canola oil
3/4 c. onion, chopped
3/4 c. sugar (yoiks!)
1/2 c. white wine
1/2 c. water
1 package fresh cranberries
1/4 tsp. ground ginger
2 tsp. fresh grated orange rind

Cook the onion in the oil for about 4 minutes. Add the sugar, wine, water, ginger and cranberries. Bring mixture to a boil for about 2 minutes then reduce to a simmer for about 8 minutes. Add the orange rind to the mixture once in the serving bowl.

THE FINAL ACT: PUMPKIN FLUFF LAYER DESSERT
With so much good food on the way, I wanted to make sure that dessert was light. Going with the flavors of the season, pumpkin seemed an appropriate base. I came across a pudding-type dessert that seemed just perfect - Pumpkin Fluff. I made it my own by creating a "layer dessert". This was a real crowd pleaser and a perfect way to end the meal.


1 16 oz. can pumpkin
1 1.5 oz. box sugar-free instant vanilla pudding mix
1 8 oz. container fat-free cool whip
2 tsp. pumpkin pie spice
1 pack cinnamon graham crackers

Take the cool whip out of the freezer so it has a few minutes to "thaw". Make the pudding and allow it to set (about 5 minutes). Mix in the pumpkin, cool whip and pumpkin pie spice.

In a serving dish crush 2 graham crackers to layer the bottom surface. Spoon or pour in half the pumpkin pudding mixture. Crumble 2-3 more graham crackers to create a middle layer. Add in the remaining mixture and top with crushed graham crackers. Put back in the refrigerator and chill for 1 hour.

Note: If you make this too far in advance the graham crackers might start to get a little soft/borderline soggy, but I have to say, I still somehow managed to enjoy leftovers 24 hours later...proof I love dessert?

And with that, HAPPY THANKSGIVING!
Eat well, be merry and enjoy the company of family and friends!

Thursday, November 17, 2011

Flourless Chocolate Cookies with Chocolate Chips and Walnuts


Flourless baked goods were always a mystery to me -- until the fateful day I stumbled upon this recipe while attempting to shamelessly google my way to the secret formula for Whole Foods' Chocolate Walnut Fudgie Cookies. While the end result for this particular recipe is flat and pancake-like, there is beauty in the minimal required ingredients!

The original recipe only calls for egg whites, powdered sugar, cocoa powder, vanilla and salt (so few that I can recite from memory!), but I decided to add in chopped walnuts and chocolate chips to prevent the cookies from spreading even more.

And for those allergic to nuts, chocolate toffee bars aren't too shabby of a substitute.

Technically if you leave out the mix-ins, these cookies have no added fat and are essentially fat free! But where's the fun in that? Also, for all you glutards out there - they're g-free!

The recipe:
(From King Arthur Flour)

Ingredients:
2 1/4 c. confectioner's sugar
1/4 tsp. salt
1 c. cocoa powder
3 large egg whites
2 tsp vanilla extract
1 c. chocolate chips
1 c. walnuts, chopped
Optional substitute: 1/2 c. chopped toffee bar (Skor or Heath)

Directions (if I can actually call it that):
Preheat the oven to 350 degrees. Lightly grease your baking sheet(s) or parchment lining the baking sheet. Mix together all the ingredients until smooth. Drop ~1 tbsp portions of the batter onto the baking sheets and bake for 8-10 minutes.

Allow the cookies to cool so they don't crumble when you try to pick them up...trust me the wait will be worth it.