Tuesday, June 12, 2012

Quick Caramel Popcorn

 
What happens when Orville Redenbacher and Mrs. Richardon get together? Instant gratification. For some reason it never occurred to me that caramel corn would be so easy to make at home...this could prove to be a very dangerous discovery. I guess the good news is that for now I am out of both popcorn and caramel sauce.

  Shockingly this recipe weighs in at less than 250 calories. Stop drooling and go make some!


The recipe:

100 calorie size bag of popcorn
2 tbsp caramel sauce (I used Mrs. Richardson's Butterscotch Caramel)

Preheat toaster oven to 250 degrees. Prepare popcorn as you normally would in the microwave. Transfer popcorn to a foil lined try and drizzle half of the caramel sauce on top, mix up with a wooden spoon, drizzle remaining sauce over the popcorn and mix again. Place the tray in the toaster oven for 10-15 minutes.

Remove from the oven and allow to cool for as long as you can stand (1-2 minutes) and enjoy!

Sunday, June 10, 2012

Zucchini & Carrot Ribbon Salad with Heirlooms and Thyme Oil

Well the good news is that I'm back to the blog. The bad news...battling chronic writers block...

When I think of zucchini, the first thing that comes to mind is my grandmother's garden in the summertime. Inevitably there would come a point when the overgrowth of zucchini caused my aunts and uncles to compare notes on who had received more and who could still stand to have a few pounds pawned off on them. 

The good news about the excess is that there are a multitude of zuchinni recipes worth trying. On the deceptively unhealthy, but delicious end of the spectrum we have zucchini bread (myth busters here). On the other hand we have raw salads, which although lower in calories, require a bit of a flavor boost. I was pleasantly surprised by the savory touch provided by the thyme oil. In just 20 minutes, everyday olive oil was transformed into an herb infused delicacy!
On the road to exploring new cooking techniques, I decided to purchase a mandolin to help with the ribbon creation. An everyday vegetable peeler proved to be easiest for the carrots, but after a few practice runs with the zucchini, I was able to get the rhythm of cutting on the mandolin. Mission accomplished! With that said, a vegetable peeler will work just fine for the zucchini too.

Thyme sprig carcasses (I decided to work some of the remaining leaves off the sprigs and keep in the oil).


The recipe:
(Adapted from Martha)
1 generous handful fresh thyme sprigs (about 1/2 ounce)
1/4 cup extra-virgin olive oil
1/2 teaspoon finely grated lemon zest, plus 2 teaspoons fresh lemon juice
2 baby zucchini (or 1 large), thinly shaved
3 carrots, thinly shaved
1 cup mixed heirloom tomatoes, cut in half crosswise (1 cup)

1/4 c spinach, roughly chopped
1/4 cup fresh basil leaves, torn if large, plus more for sprinkling (optional)
Pinch of red-pepper flakes
1/4 teaspoon coarse salt
Coarsely ground pepper
3 ounces fresh ricotta (1/3 cup)
Balsamic Glaze (now sold at Trader Joes!, also found at whole foods)


Place thyme on a cutting board, and bruise with the dull edge of a knife. Place thyme and oil in a small saucepan. Cover, and heat over medium heat until small bubbles appear. Turn off heat, and steep thyme, covered, 20 minutes.  

Meanwhile, slice the remaining ingredients and add into a separate bowl. 

After the 20 minutes, discard thyme sprigs, leaving loose thyme leaves in oil. Whisk together lemon zest and juice and 3 tablespoons thyme oil (reserve remaining oil for another use; it can be refrigerated up to 2 weeks).

Combine the dressing with the zucchini, carrot, tomatoes, spinach, basil, red-pepper flakes, and salt. Season with pepper, and toss. Divide half the salad between 2 plates, and dot with half the ricotta. Top with remaining salad and remaining ricotta. Drizzle with balsamic glaze.

Thursday, June 7, 2012

Poached Egg Over Spinach-Basil-Walnut Pesto


Ok, YUM. Honestly, I don't even know where to start because this was just such a delightful culinary experience. If there were some miraculous way to rewind and re-savor those first bites I totally would, but instead I just had to settle for using the pesto remains to recreate the dish for my next two meals! The idea for this recipe came to me while getting lost in thought about ways to get creative with my overzealous egg consumption. I've always wanted to make my own pesto...and perfect the art of egg poaching (after minimal success with poach pods). Finally, an outlet for both!
Starting from the base, Whole Foods comes through again for me with their bakery fresh Quinoa Flax bread. If you have a WF nearby I highly recommend - otherwise any loaf of bread will work (I have to do my part to put in a plug for whole grain/ whole wheat varieties).

There are so many different varieties of pesto out there that are incredibly quick and easy to whip up. I was intrigued by using spinach and walnut, hence spinach-walnut-basil pesto, but feel free to get creative and of course dial the amounts of various ingredients up and down to your liking. Mine was strong in the garlic department, not complaining, but of course that's not for everyone. With that said, consider yourself warned.

Now onto the egg poaching portion. Don't be intimidated - you too can create a masterpiece of a poached egg. No need to reinvent the wheel on how to go about the task because Smitten Kitchen has a fantastic explanation. Check out the helpful tutorial.


The recipe:

1 c spinach
1/2 c basil
1 clove of garlic, sliced

1 tsp lemon juice
1 tbsp chopped walnuts, lightly toasted
1 tbsp parmigiano reggiano cheese
4 tsp EVOO (add more as necessary)
Salt and pepper

1 egg
(Vinegar for poaching)
Sliced tomato
Slice of your favorite bread, toasted

Put on water for the egg. Then roughly chop spinach, basil and garlic - add to blender/chopper along with lemon juice, chopped walnuts and parmesan cheese.  Pulse until blended. Add in olive oil until desired consistency is achieved (for me this was ~4 tsp). Then season with salt and pepper. 

Drop egg into simmering water and poach for 3-4 minutes. Meanwhile toast your bread and slice the tomato. Remove egg from water with a slotted spoon and allow it to drain over the pot or set on a paper towel. 

Spread desired amount of pesto on toast and top with poached egg and a sprinkling of black pepper. Mangia!

Sunday, May 27, 2012

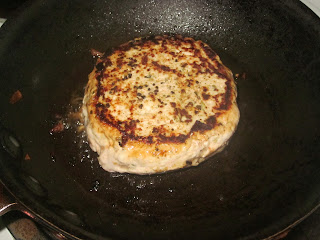
Mediterranean Turkey Burgers with Mint-Pomegranate Yogurt Sauce

Well I wasn't expecting a return to the blog at least until I was through my test (1 week!!!), but this Memorial Day Weekend of studying and isolation has left me somewhat craving a creative outlet. So today, I bring to you my gourmet MDW cook-out. 

The latest issue of cooking light features an array of burger recipes and even spills the beans on techniques for a better burger. Flipping through the pages, I knew I had to finally get around to making the mediterranean/greek burgers I have been putting off for quite a while. Some of my favorite restaurants in NYC (Meme Mediterranean, ilili) serve the most amazing mediterranean food  and lamb burgers are always on the menu - I opted for a fusion of the same flavors, using turkey instead. The special twist is that nestled inside is a wonderful mixture of feta cheese, onion and garlic.

I happened to find/use 99% fat-free ground turkey, which is pretty much asking for the burger to be dried out, but fear not, that's where the greek yogurt comes in. When mixed in with the ground meat and spices, it adds a nice amount of moisture to the equation. In terms of the spices, I probably could have been a bit more liberal in the quantities, but I thought the flavors worked nicely regardless. In fact, I decided to save my bread until the end of my meal so I could enjoy the flavors of the burger free of distraction.
While normally, I would have topped these burgers off with some traditional tzatziki, I had an inexplicable case of pomegranates on the brain, so tzatziki had to step aside for its replacement...mint pomegranate yogurt sauce. Don't be surprised if there is another pomegranate post sometime in the near future - I recall reading somewhere that pomegranate seeds don't keep for too long.


Happy Memorial Day from my kitchen to yours!


The recipe:

Burger:
2 tbsp. red onion
1-2 cloves garlic
1 tbsp. feta cheese

1/4 lb. ground turkey (I used 99% fat free)
1 tbsp. plain non-fat greek yogurt
1/2 tsp. lemon juice
1/2 tsp. dried oregano
1/2 tsp. rosemary
1/2 tsp. black pepper
1/4 tsp. ground cumin
1/8 tsp. paprika
1/8 tsp. of ground cinnamon

Italian bread (or whatever bread you choose)

Mint Pomegranate Yogurt Sauce
Fresh mint leaves, 1-2 tsp chopped
1 tbsp. pomegranates seeds
1 tbsp. plain non-fat greek yogurt

Garnish:
Baby spinach leaves
Cucumber

Heat 1 tsp of olive oil in a nonstick skillet over medium-high heat. Add the onion and cook until soft and translucent, about 3 minutes then add garlic and saute for another minute. Remove from heat, add feta cheese and sprinkle with pepper.

Add ground turkey to a bowl, add yogurt, lemon juice, cumin, oregano, rosemary, paprika and cinnamon. Mix together (don't overmix) until combined. Make 2 equal sized patties out of the turkey mixture. Put the onion-feta mixture onto half of the patty. Top with the other patty working the turkey around the edges to seal burger closed.

Spray a nonstick grill pan with cooking spray and heat over medium-high heat. Grill the burger until cooked through, about 5 minutes per side.

Meanwhile chop mint and mix together with pomegranate seeds and greek yogurt.

To serve, slice burger in half and place both halves on top of lightly toasted italian bread. Top with yogurt sauce, then if you so choose add cucumber slices and baby spinach.


Sunday, March 4, 2012

Oreo Cheesecake Cupcakes

Note to self: refrain from making delicious treats when your lenten sacrifice is sweets! I happened to come across these gems during one of my occasional scans through a few favorite food blogs and instantly I knew I had to make them.
At work, my group has instated the tradition of taking a short break out of the day to celebrate each of our birthdays. I was on treat duty this time around...and decided to test my ability to resist temptation (at least until Sunday).

I opted for a reduced fat version of the original and the result was still a big hit - as proven by my coworkers coming back for seconds, creating a cheesecake cupcake with a not too sweet, not too creamy taste. The recipe itself was very simple and I would definitely not hesitate to make these little devils again.

The recipe:
(Inspiration: Handle the Heat)

1 package of Reduced Fat Oreos, 24 left whole, remainder coarsely chopped
3-8oz. packages reduced fat cream cheese, room temperature
3/4 cup sugar
1 tsp vanilla extract
3 large eggs, room temperature, lightly beaten
3/4 cup sour cream
Pinch of salt

Preheat oven to 275 degrees. Line standard muffin tins with paper liners. Place 1 whole cookie in the bottom of each lined cup.

If you have an electric mixer, use it. Otherwise, arm strength will have to suffice. Mix cream cheese until smooth, scraping down sides of bowl as needed. Gradually add sugar, and stir until combined. Mix in vanilla.

Add in eggs, a bit at a time. Add in sour cream and salt. Meanwhile, crumble remaining cookies in a plastic bag (I also used a rolling pin). Then stir in the chopped cookies by hand.

Divide batter evenly among cookie-lined cups, filling each almost to the top. Bake, rotating pan halfway through, until filling is set, about 22 minutes. Transfer to wire racks to cool completely.

Refrigerate at least 4 hours (or up to overnight). Remove from tins just before serving.

Sunday, February 19, 2012

Blackened Tilapia Baja Tacos

If it weren't for the mild winter we've experienced, right around now would mark the time of year when I start really craving a beach vacation. Actually, scratch that, I am still craving one! Despite my best efforts to escape for President's Day weekend, the $800 flights to Florida just didn't seem all that logical, leaving me with culinary escape as my best option.
No food screams "island" to me quite like fish tacos so I decided to bring back a recently discovered favorite, blackened baja tacos. Last September I took a trip to California, starting in the South and making my way up to the San Francisco area. One culinary dream I envisioned was eating the best fish tacos of my life, however sadly that remained just a dream, especially because I found this recipe right before I left.

The recipe (Adapted from Cooking Light):

1/4 cup fat-free sour cream or 0% Plain Greek Yogurt
2 tablespoons chopped fresh cilantro
2 tablespoons fresh lime juice
1 jalapeño pepper, seeded and chopped
1 cup thinly sliced white onion

1 1/2 teaspoons paprika
1 1/2 teaspoons brown sugar
1 teaspoon dried oregano
3/4 teaspoon garlic powder
1/2 teaspoon salt
1/2 teaspoon ground cumin
1/4 teaspoon ground red pepper
4 (6-ounce) tilapia fillets (I made 2 fillets with this quantity of seasoning and had a bit of leftover that I keep around for chicken)

Handful of red or green cabbage
6-inch corn tortillas
1/2 ripe peeled avocado, thinly sliced
4 lime wedges

Combine first 4 ingredients in a food processor; process until smooth. Combine jalapeño sauce and onion in a small bowl. Scale the quantity of sour cream up or down depending on desired level of "kick".

Combine paprika and next 6 ingredients (through ground red pepper); sprinkle evenly over fish and press in. Heat skillet over medium-high heat and coat with cooking spray. Add fish to pan and cook approximately 3 minutes on each side or to desired level of doneness.

Warm tortillas and top with fish, avocado, cabbage and jalapeño sauce. And with that, escape to the tropics!

Monday, February 6, 2012

Snack Time: Baked Chickpeas

Neglect: The passing of three weeks before writing in my food blog. Sorry readers, for the next few months you might have to get used to it. Work has been nothing short of intense to start the year, while attempting to study for the CFA, keep up with friends/family, etc...you get the point!


Anyway, here is a quick one to break the hiatus. As much as I love cooking, I also like variety, so as a result, I sometimes wind up with ingredients that run the risk going bad and to waste...never something I like to have happen. So as therapeutic as cooking is for me and as much as I'd like to think my brain shuts off when I'm not at work or studying, even cooking becomes a problem solving exercise! Case in point: baked chickpea snacks. I love having chickpeas in my salads, but they do tend to go bad after a few days of sitting in the fridge. This simple recipe is an easy fix to that problem and the end result is a great crunchy snack that doesn't even require a full-sized oven. I used my trusty little toaster oven. If the low maintenance recipe wasn't enough to convince you to try them, Chickpeas are also a very good source of folic acid, fiber, rich in iron, copper, zinc, and magnesium AND are a good source of protein. The recipe:
-1 can (or what remains of the can) of Chickpeas (Garbanzo Beans)
-Cooking spray or Olive Oil to very lightly coat-
Seasoning of your choice - I used primarily Tony's Creole, but this is your opportunity to get creative
-Salt


Preheat oven/toaster oven to 400˚F.
Drain chickpeas and rinse under cold water. Lay out on paper towels and pat dry with paper towels on top, roling around to remove the chickpea shells as you go.

Toss chickpeas with a small amount of oil, spices, and salt . Put them on a baking sheet in a single layer.

Bake for about 30-40 minutes until golden brown and crunchy. Toss and rotate about every 10 minutes.

They get crunchier after they cool so allow them to sit for a bit. Store in an airtight container at room temperature.